Forty original questions check whether your scanning routine holds up. Items mix exact copies, quarter turns in either direction, one-cell defects, mirrored decoys, contact checks and occluded edges, so you need to choose the right feature to inspect first instead of examining every choice in full.
When checking an AO figure quickly, what should you read before comparing the four pictures?
Show the answer
Answer: B
The prompt states which moves are legal, such as sliding, turning or flipping, and which edges or markers must meet. Those rules are the scoring standard, so reading them first tells you what to look for. A candidate can resemble the source closely and still be wrong because it uses a forbidden flip or misses a required contact. Display features such as card color, printing order or explanation length are presentation details and say nothing about whether the geometry is valid.
A: Incorrect. Answer letters do not encode the transformation and can change from question to question. The permitted operations define what transformations count as legal. A candidate can look similar while breaking the stated rule.
B (correct): Correct. The permitted operations define what transformations count as legal. A candidate can look similar while breaking the stated rule. This fully preserves the operation and the original figure.
C: Incorrect. Card background and border are display features and do not decide piece geometry.
D: Incorrect. Print order is arbitrary and carries no information about which transformations are legal.
Question 2 of 40 · easy
A prompt allows translation only. Which candidate remains possible?
Show the answer
Answer: D
A translation slides the whole shape the same distance in one direction. Its outline, its orientation, which way it faces and its cell count all stay unchanged, so the only valid candidate is the original shape in a new position. Each distractor applies a different operation: a quarter turn changes orientation, a mirror image reverses handedness, and an extra cell adds material. When translation is the only allowed move, compare the candidate directly with the source without turning it in your head.
A: Incorrect. Adding a square changes the object rather than simply sliding it. Translation changes location only. It preserves rotation, handedness, occupied-cell count, and marker ownership.
B: Incorrect. Mirror reflection reverses handedness, which is forbidden when only translation is allowed.
C: Incorrect. A quarter turn changes the orientation, even without moving the shape, so it is not a pure translation.
D (correct): Correct. Translation changes location only. It preserves rotation, handedness, occupied-cell count, and marker ownership. This fully preserves the operation and the original figure.
Question 3 of 40 · easy
A gold dot marks one filled cell in the source. Which property must remain constant when the shape rotates?
Show the answer
Answer: D
A rigid rotation moves the whole shape as one solid object, so every cell carries its markings with it. The dot stays on the same physical cell even though that cell now sits in a different place on the screen. To check a candidate, find the dotted cell in the source, describe it by its neighbors, such as the end cell of the long arm, and look for that same cell after the turn. Screen position and height naturally change during rotation.
A: Incorrect. The screen x coordinate can shift when a rigid object moves or turns. The marker travels with the same cell under a rigid transformation; its screen position can change.
B: Incorrect. The dot need not occupy the highest cell after a rotation. The marker travels with the same cell under a rigid transformation; its screen position can change.
C: Incorrect. The dot is not allowed to migrate to a different occupied square. The marker travels with the same cell under a rigid transformation; its screen position can change.
D (correct): Correct. The marker travels with the same cell under a rigid transformation; its screen position can change. This fully preserves the operation and the original figure.
Question 4 of 40 · easy
Why is a candidate containing an extra square invalid under a rigid rotation?
Show the answer
Answer: B
A rigid motion moves an object without bending, stretching, cutting or adding to it. Each source cell ends up as exactly one cell in the result, so the number of filled cells must stay the same. A candidate with an extra square has gained material, which no rotation can produce, so it is eliminated at once. Counting cells is one of the fastest checks available. Rotation does not require symmetry, and it never removes squares either.
A: Incorrect. Rotations apply to asymmetric figures as well as symmetric figures. Rigid rotations preserve the exact set and number of occupied cells; adding material changes the object.
B (correct): Correct. Rigid rotations preserve the exact set and number of occupied cells; adding material changes the object. This fully preserves the operation and the original figure.
C: Incorrect. A rigid rotation neither removes nor adds filled cells.
D: Incorrect. No circular outline requirement exists for a rigid rotation.
Question 5 of 40 · easy
Which observation most quickly proves that a forbidden mirror image is wrong?
Show the answer
Answer: A
Rotation and reflection differ in one key property: handedness. A rotated shape can always be turned back to match the source, but a mirror image cannot, just as a left hand cannot be rotated into a right hand. An asymmetric feature such as a notch reveals this immediately, because after a reflection it points the opposite way relative to the rest of the shape. Color, position in the card and label size are unrelated to handedness and cannot prove anything.
A (correct): Correct. Reflection changes handedness. Color and position in a card do not determine whether the rigid orientation is legal. This fully preserves the operation and the original figure.
B: Incorrect. The center position in a card is irrelevant to a reflected shape. Reflection changes handedness. Color and position in a card do not determine whether the rigid orientation is legal.
C: Incorrect. Text or label dimensions do not establish geometric handedness. Reflection changes handedness. Color and position in a card do not determine whether the rigid orientation is legal.
D: Incorrect. Matching the shade of blue gives no evidence about whether the shape was mirrored.
Question 6 of 40 · easy
In a clockwise 90° rotation, where does the original upward direction point?
Show the answer
Answer: C
Track directions the way a clock hand moves: clockwise goes from 12 to 3, so a quarter turn clockwise sends up to right. The same turn sends right to down, down to left, and left to up. Learning this cycle lets you predict where any feature will point. A frequent error is mixing up turn directions, since left is where up goes after a counterclockwise quarter turn. Down needs a half turn, and up stays put only with no rotation.
A: Incorrect. A clockwise turn maps up to right, not left; left describes counterclockwise. A clockwise quarter turn maps up to right; this anchor gives a fast orientation prediction.
B: Incorrect. Down results from a half turn, not one clockwise quarter turn.
C (correct): Correct. A clockwise quarter turn maps up to right; this anchor gives a fast orientation prediction. This fully preserves the operation and the original figure.
D: Incorrect. The original up direction cannot stay up after a quarter turn.
Question 7 of 40 · easy
A source has seven filled cells. One candidate has six. What is the fastest justified action?
Show the answer
Answer: B
Rigid transformations such as turns and slides keep every part of the shape, so a seven-cell source must produce exactly seven cells in any valid candidate. Counting is fast and decisive: a six-cell figure is missing material and can be rejected without examining its orientation. This is a strong first filter for any assembly question. Imagining the missing cell is hidden or flipping the shape does not help, because no allowed operation removes or restores a cell.
A: Incorrect. Assuming a missing source cell has vanished violates the stated whole-shape comparison. Under an unmodified rigid transformation, source cell count must be conserved.
B (correct): Correct. Under an unmodified rigid transformation, source cell count must be conserved. This fully preserves the operation and the original figure.
C: Incorrect. Simplicity cannot justify losing a filled cell during a rigid transformation. Under an unmodified rigid transformation, source cell count must be conserved.
D: Incorrect. A reflection still cannot restore missing material to an option. Under an unmodified rigid transformation, source cell count must be conserved.
Question 8 of 40 · easy
Which evidence is stronger than a general feeling that an option looks familiar?
Show the answer
Answer: C
Strong evidence is something you can verify against a rule. For a turned shape, predict where specific features such as the dot and the notch must end up, then check whether the candidate places them exactly there. A vague sense of familiarity can come from overall resemblance, which mirror images and wrong turns also share. Background color, border style and the candidate's position among the choices are presentation details, not geometry, so they cannot confirm a correct transformation.
A: Incorrect. Matching the background says nothing about where the rotated dot or notch ends up.
B: Incorrect. Answer positions are arbitrary and are not geometric evidence.
C (correct): Correct. Specific transformed features are checkable; subjective familiarity is not a sufficient reason. This fully preserves the operation and the original figure.
D: Incorrect. Card border thickness belongs to presentation, not to source geometry. Specific transformed features are checkable; subjective familiarity is not a sufficient reason.
Question 9 of 40 · easy
When two candidates share the correct silhouette but place a dot on different cells, what should you inspect?
Show the answer
Answer: C
When outlines match, the marker is the tiebreaker, because a rigid turn keeps the dot on the same physical cell. Identify that cell in the source by its role, such as the corner cell at the end of the short arm, apply the stated rotation, and see where that cell lands. Only one candidate should carry the dot there. Dot brightness, card size and the labels printed beside the cards are display features that do not show which cell carries the marker.
A: Incorrect. Card dimensions cannot tell whether the marked cell moved correctly.
B: Incorrect. Choice labels are not connected to source-cell identity. The marker is attached to a specific source cell. Tracking that cell distinguishes equal-outline decoys.
C (correct): Correct. The marker is attached to a specific source cell. Tracking that cell distinguishes equal-outline decoys. This fully preserves the operation and the original figure.
D: Incorrect. Dot brightness or size does not show which source square carries the marker.
Question 10 of 40 · easy
In CAT-ASVAB, what should you assume after submitting a response?
Show the answer
Answer: A
The CAT-ASVAB is computer-adaptive: each response helps the computer choose the next question, so once you submit an answer it is final and you cannot go back to change it. That makes checking before you submit essential. The misconception comes from paper tests, where you can skip items and return at the end. On the CAT version there is no review list or back button for submitted questions. Settle each item with a clear reason before you move on.
A (correct): Correct. Official CAT-ASVAB guidance says a submitted question cannot be revisited; verify before committing.
B: Incorrect. A CAT item is not automatically presented for a second review after submission. Official CAT-ASVAB guidance says a submitted question cannot be revisited; verify before committing.
C: Incorrect. Using the back button cannot reopen an already submitted CAT question. Official CAT-ASVAB guidance says a submitted question cannot be revisited; verify before committing.
D: Incorrect. The paper version has different review behaviors, but the CAT interface does not allow a return. Official CAT-ASVAB guidance says a submitted question cannot be revisited; verify before committing.
Question 11 of 40 · medium
A 180° rotation is requested. Which directional prediction is correct?
Show the answer
Answer: C
A 180° rotation is two quarter turns in a row, so every direction reverses: top goes to bottom, bottom to top, left to right and right to left. It is still a rotation, so handedness is preserved; this differs from a mirror, which reverses only one axis. A quick test is to rotate the page in your hands. The common errors are sending a side to a perpendicular direction, which is a quarter turn, or treating the half turn as a reflection.
A: Incorrect. A 180-degree rotation preserves handedness; it is not a reflection. A half-turn reverses both vertical and horizontal directions without reflecting handedness.
B: Incorrect. A half turn sends the top to the bottom rather than preserving its position. A half-turn reverses both vertical and horizontal directions without reflecting handedness.
C (correct): Correct. A half-turn reverses both vertical and horizontal directions without reflecting handedness. This fully preserves the operation and the original figure.
D: Incorrect. The source right points left after a half turn, not downward. A half-turn reverses both vertical and horizontal directions without reflecting handedness.
Question 12 of 40 · medium
A very irregular outline immediately eliminates three options. What is the most efficient next step?
Show the answer
Answer: A
Elimination narrows the field, but the remaining option still has to be confirmed against every stated rule, because sometimes all four options contain a flaw and you must re-read the stem. Check the survivor's marker position, allowed operation and required contacts. This takes seconds and catches misreadings. Going back over options already rejected for clear reasons wastes time, and choosing one of them at random throws away evidence. Ignoring the prompt's wording removes the very rules that decide correctness.
A (correct): Correct. An objective elimination pass should be followed by a final consistency check of the surviving candidate. This fully preserves the operation and the original figure.
B: Incorrect. Randomly choosing a rejected candidate discards evidence you already obtained.
C: Incorrect. Ignoring the instruction can make an otherwise similar figure invalid. An objective elimination pass should be followed by a final consistency check of the surviving candidate.
D: Incorrect. Reconsidering rejected candidates wastes attention without checking the survivor.
Question 13 of 40 · medium
Scan the SOURCE diagram and apply translation only (no rotation or reflection). Which option displays the resulting marked shape? Check the uppermost spur before comparing the lower branch.
Show the answer
Answer: B
A translation only (no rotation or reflection) maps every filled source cell and the gold dot together. The valid drawing preserves the exact cell count and shape relationships. Check the uppermost spur before comparing the lower branch. The other options show illegal orientation, mirror, altered geometry, or moved marker.
A: Incorrect: this option applies a clockwise turn instead of the requested transformation. Check the uppermost spur before comparing the lower branch.
B (correct): Correct: A translation only (no rotation or reflection) maps every filled source cell and the gold dot together. The valid drawing preserves the exact cell count and shape relationships. Check the uppermost spur before comparing the lower branch. The other options show illegal orientation, mirror, altered geometry, or moved marker.
C: Incorrect: this option applies a half-turn instead of the requested transformation. Check the uppermost spur before comparing the lower branch.
D: Incorrect: this option applies a counterclockwise turn instead of the requested transformation. Check the uppermost spur before comparing the lower branch.
Question 14 of 40 · medium
Scan the SOURCE diagram and apply translation only (no rotation or reflection). Which option displays the resulting marked shape? The gold dot must travel with the same marked square.
Show the answer
Answer: A
A translation only (no rotation or reflection) maps every filled source cell and the gold dot together. The valid drawing preserves the exact cell count and shape relationships. The gold dot must travel with the same marked square. The other options show illegal orientation, mirror, altered geometry, or moved marker.
A (correct): Correct: A translation only (no rotation or reflection) maps every filled source cell and the gold dot together. The valid drawing preserves the exact cell count and shape relationships. The gold dot must travel with the same marked square. The other options show illegal orientation, mirror, altered geometry, or moved marker.
B: Incorrect: this option applies a counterclockwise turn instead of the requested transformation. The gold dot must travel with the same marked square.
C: Incorrect: this option applies a half-turn instead of the requested transformation. The gold dot must travel with the same marked square.
D: Incorrect: this option applies a clockwise turn instead of the requested transformation. The gold dot must travel with the same marked square.
Question 15 of 40 · medium
Scan the SOURCE diagram and apply translation only (no rotation or reflection). Which option displays the resulting marked shape? A mirror cannot replace the requested rigid operation.
Show the answer
Answer: D
A translation only (no rotation or reflection) maps every filled source cell and the gold dot together. The valid drawing preserves the exact cell count and shape relationships. A mirror cannot replace the requested rigid operation. The other options show illegal orientation, mirror, altered geometry, or moved marker.
A: Incorrect: this option applies a counterclockwise turn instead of the requested transformation. A mirror cannot replace the requested rigid operation.
B: Incorrect: this option applies a half-turn instead of the requested transformation. A mirror cannot replace the requested rigid operation.
C: Incorrect: this option applies a clockwise turn instead of the requested transformation. A mirror cannot replace the requested rigid operation.
D (correct): Correct: A translation only (no rotation or reflection) maps every filled source cell and the gold dot together. The valid drawing preserves the exact cell count and shape relationships. A mirror cannot replace the requested rigid operation. The other options show illegal orientation, mirror, altered geometry, or moved marker.
Question 16 of 40 · medium
Scan the SOURCE diagram and apply translation only (no rotation or reflection). Which option displays the resulting marked shape? Pay attention to the single-square notch in the outline.
Show the answer
Answer: D
A translation only (no rotation or reflection) maps every filled source cell and the gold dot together. The valid drawing preserves the exact cell count and shape relationships. Pay attention to the single-square notch in the outline. The other options show illegal orientation, mirror, altered geometry, or moved marker.
A: Incorrect: this option applies a half-turn instead of the requested transformation. Pay attention to the single-square notch in the outline.
B: Incorrect: this option applies a clockwise turn instead of the requested transformation. Pay attention to the single-square notch in the outline.
C: Incorrect: this option applies a counterclockwise turn instead of the requested transformation. Pay attention to the single-square notch in the outline.
D (correct): Correct: A translation only (no rotation or reflection) maps every filled source cell and the gold dot together. The valid drawing preserves the exact cell count and shape relationships. Pay attention to the single-square notch in the outline. The other options show illegal orientation, mirror, altered geometry, or moved marker.
Question 17 of 40 · medium
Scan the SOURCE diagram and apply translation only (no rotation or reflection). Which option displays the resulting marked shape? Reject any candidate with an added or missing occupied square.
Show the answer
Answer: B
A translation only (no rotation or reflection) maps every filled source cell and the gold dot together. The valid drawing preserves the exact cell count and shape relationships. Reject any candidate with an added or missing occupied square. The other options show illegal orientation, mirror, altered geometry, or moved marker.
A: Incorrect: this option applies a counterclockwise turn instead of the requested transformation. Reject any candidate with an added or missing occupied square.
B (correct): Correct: A translation only (no rotation or reflection) maps every filled source cell and the gold dot together. The valid drawing preserves the exact cell count and shape relationships. Reject any candidate with an added or missing occupied square. The other options show illegal orientation, mirror, altered geometry, or moved marker.
C: Incorrect: this option applies a half-turn instead of the requested transformation. Reject any candidate with an added or missing occupied square.
D: Incorrect: this option applies a clockwise turn instead of the requested transformation. Reject any candidate with an added or missing occupied square.
Question 18 of 40 · medium
Scan the SOURCE diagram and apply translation only (no rotation or reflection). Which option displays the resulting marked shape? The figure may move within a card; absolute position is irrelevant.
Show the answer
Answer: D
A translation only (no rotation or reflection) maps every filled source cell and the gold dot together. The valid drawing preserves the exact cell count and shape relationships. The figure may move within a card; absolute position is irrelevant. The other options show illegal orientation, mirror, altered geometry, or moved marker.
A: Incorrect: this option applies a counterclockwise turn instead of the requested transformation. The figure may move within a card; absolute position is irrelevant.
B: Incorrect: this option applies a half-turn instead of the requested transformation. The figure may move within a card; absolute position is irrelevant.
C: Incorrect: this option applies a clockwise turn instead of the requested transformation. The figure may move within a card; absolute position is irrelevant.
D (correct): Correct: A translation only (no rotation or reflection) maps every filled source cell and the gold dot together. The valid drawing preserves the exact cell count and shape relationships. The figure may move within a card; absolute position is irrelevant. The other options show illegal orientation, mirror, altered geometry, or moved marker.
Question 19 of 40 · medium
Scan the SOURCE diagram and apply translation only (no rotation or reflection). Which option displays the resulting marked shape? Use the longest arm first and the marked cell as confirmation.
Show the answer
Answer: C
A translation only (no rotation or reflection) maps every filled source cell and the gold dot together. The valid drawing preserves the exact cell count and shape relationships. Use the longest arm first and the marked cell as confirmation. The other options show illegal orientation, mirror, altered geometry, or moved marker.
A: Incorrect: this option applies a clockwise turn instead of the requested transformation. Use the longest arm first and the marked cell as confirmation.
B: Incorrect: this option applies a counterclockwise turn instead of the requested transformation. Use the longest arm first and the marked cell as confirmation.
C (correct): Correct: A translation only (no rotation or reflection) maps every filled source cell and the gold dot together. The valid drawing preserves the exact cell count and shape relationships. Use the longest arm first and the marked cell as confirmation. The other options show illegal orientation, mirror, altered geometry, or moved marker.
D: Incorrect: this option applies a half-turn instead of the requested transformation. Use the longest arm first and the marked cell as confirmation.
Question 20 of 40 · medium
Scan the SOURCE diagram and apply a 90° CLOCKWISE rotation (no reflection). Which option displays the resulting marked shape? Check the uppermost spur before comparing the lower branch.
Show the answer
Answer: B
A 90° CLOCKWISE rotation (no reflection) maps every filled source cell and the gold dot together. The valid drawing preserves the exact cell count and shape relationships. Check the uppermost spur before comparing the lower branch. The other options show illegal orientation, mirror, altered geometry, or moved marker.
A: Incorrect: this option applies a counterclockwise turn instead of the requested transformation. Check the uppermost spur before comparing the lower branch.
B (correct): Correct: A 90° CLOCKWISE rotation (no reflection) maps every filled source cell and the gold dot together. The valid drawing preserves the exact cell count and shape relationships. Check the uppermost spur before comparing the lower branch. The other options show illegal orientation, mirror, altered geometry, or moved marker.
C: Incorrect: this option applies a half-turn instead of the requested transformation. Check the uppermost spur before comparing the lower branch.
D: Incorrect: this option applies no rotation instead of the requested transformation. Check the uppermost spur before comparing the lower branch.
Question 21 of 40 · medium
Scan the SOURCE diagram and apply a 90° CLOCKWISE rotation (no reflection). Which option displays the resulting marked shape? The gold dot must travel with the same marked square.
Show the answer
Answer: D
A 90° CLOCKWISE rotation (no reflection) maps every filled source cell and the gold dot together. The valid drawing preserves the exact cell count and shape relationships. The gold dot must travel with the same marked square. The other options show illegal orientation, mirror, altered geometry, or moved marker.
A: Incorrect: this option applies a half-turn instead of the requested transformation. The gold dot must travel with the same marked square.
B: Incorrect: this option applies no rotation instead of the requested transformation. The gold dot must travel with the same marked square.
C: Incorrect: this option applies a counterclockwise turn instead of the requested transformation. The gold dot must travel with the same marked square.
D (correct): Correct: A 90° CLOCKWISE rotation (no reflection) maps every filled source cell and the gold dot together. The valid drawing preserves the exact cell count and shape relationships. The gold dot must travel with the same marked square. The other options show illegal orientation, mirror, altered geometry, or moved marker.
Question 22 of 40 · medium
Scan the SOURCE diagram and apply a 90° CLOCKWISE rotation (no reflection). Which option displays the resulting marked shape? A mirror cannot replace the requested rigid operation.
Show the answer
Answer: A
A 90° CLOCKWISE rotation (no reflection) maps every filled source cell and the gold dot together. The valid drawing preserves the exact cell count and shape relationships. A mirror cannot replace the requested rigid operation. The other options show illegal orientation, mirror, altered geometry, or moved marker.
A (correct): Correct: A 90° CLOCKWISE rotation (no reflection) maps every filled source cell and the gold dot together. The valid drawing preserves the exact cell count and shape relationships. A mirror cannot replace the requested rigid operation. The other options show illegal orientation, mirror, altered geometry, or moved marker.
B: Incorrect: this option applies a counterclockwise turn instead of the requested transformation. A mirror cannot replace the requested rigid operation.
C: Incorrect: this option applies no rotation instead of the requested transformation. A mirror cannot replace the requested rigid operation.
D: Incorrect: this option applies a half-turn instead of the requested transformation. A mirror cannot replace the requested rigid operation.
Question 23 of 40 · medium
Scan the SOURCE diagram and apply a 90° CLOCKWISE rotation (no reflection). Which option displays the resulting marked shape? Pay attention to the single-square notch in the outline.
Show the answer
Answer: A
A 90° CLOCKWISE rotation (no reflection) maps every filled source cell and the gold dot together. The valid drawing preserves the exact cell count and shape relationships. Pay attention to the single-square notch in the outline. The other options show illegal orientation, mirror, altered geometry, or moved marker.
A (correct): Correct: A 90° CLOCKWISE rotation (no reflection) maps every filled source cell and the gold dot together. The valid drawing preserves the exact cell count and shape relationships. Pay attention to the single-square notch in the outline. The other options show illegal orientation, mirror, altered geometry, or moved marker.
B: Incorrect: this option applies a half-turn instead of the requested transformation. Pay attention to the single-square notch in the outline.
C: Incorrect: this option applies a counterclockwise turn instead of the requested transformation. Pay attention to the single-square notch in the outline.
D: Incorrect: this option applies no rotation instead of the requested transformation. Pay attention to the single-square notch in the outline.
Question 24 of 40 · medium
Scan the SOURCE diagram and apply a 90° CLOCKWISE rotation (no reflection). Which option displays the resulting marked shape? Reject any candidate with an added or missing occupied square.
Show the answer
Answer: D
A 90° CLOCKWISE rotation (no reflection) maps every filled source cell and the gold dot together. The valid drawing preserves the exact cell count and shape relationships. Reject any candidate with an added or missing occupied square. The other options show illegal orientation, mirror, altered geometry, or moved marker.
A: Incorrect: this option applies a half-turn instead of the requested transformation. Reject any candidate with an added or missing occupied square.
B: Incorrect: this option applies no rotation instead of the requested transformation. Reject any candidate with an added or missing occupied square.
C: Incorrect: this option applies a counterclockwise turn instead of the requested transformation. Reject any candidate with an added or missing occupied square.
D (correct): Correct: A 90° CLOCKWISE rotation (no reflection) maps every filled source cell and the gold dot together. The valid drawing preserves the exact cell count and shape relationships. Reject any candidate with an added or missing occupied square. The other options show illegal orientation, mirror, altered geometry, or moved marker.
Question 25 of 40 · medium
Scan the SOURCE diagram and apply a 90° CLOCKWISE rotation (no reflection). Which option displays the resulting marked shape? The figure may move within a card; absolute position is irrelevant.
Show the answer
Answer: C
A 90° CLOCKWISE rotation (no reflection) maps every filled source cell and the gold dot together. The valid drawing preserves the exact cell count and shape relationships. The figure may move within a card; absolute position is irrelevant. The other options show illegal orientation, mirror, altered geometry, or moved marker.
A: Incorrect: this option applies a counterclockwise turn instead of the requested transformation. The figure may move within a card; absolute position is irrelevant.
B: Incorrect: this option applies no rotation instead of the requested transformation. The figure may move within a card; absolute position is irrelevant.
C (correct): Correct: A 90° CLOCKWISE rotation (no reflection) maps every filled source cell and the gold dot together. The valid drawing preserves the exact cell count and shape relationships. The figure may move within a card; absolute position is irrelevant. The other options show illegal orientation, mirror, altered geometry, or moved marker.
D: Incorrect: this option applies a half-turn instead of the requested transformation. The figure may move within a card; absolute position is irrelevant.
Question 26 of 40 · medium
Scan the SOURCE diagram and apply a 90° CLOCKWISE rotation (no reflection). Which option displays the resulting marked shape? Use the longest arm first and the marked cell as confirmation.
Show the answer
Answer: C
A 90° CLOCKWISE rotation (no reflection) maps every filled source cell and the gold dot together. The valid drawing preserves the exact cell count and shape relationships. Use the longest arm first and the marked cell as confirmation. The other options show illegal orientation, mirror, altered geometry, or moved marker.
A: Incorrect: this option applies a half-turn instead of the requested transformation. Use the longest arm first and the marked cell as confirmation.
B: Incorrect: this option applies no rotation instead of the requested transformation. Use the longest arm first and the marked cell as confirmation.
C (correct): Correct: A 90° CLOCKWISE rotation (no reflection) maps every filled source cell and the gold dot together. The valid drawing preserves the exact cell count and shape relationships. Use the longest arm first and the marked cell as confirmation. The other options show illegal orientation, mirror, altered geometry, or moved marker.
D: Incorrect: this option applies a counterclockwise turn instead of the requested transformation. Use the longest arm first and the marked cell as confirmation.
Question 27 of 40 · medium
Scan the SOURCE diagram and apply a 180° rotation (no reflection). Which option displays the resulting marked shape? Check the uppermost spur before comparing the lower branch.
Show the answer
Answer: B
A 180° rotation (no reflection) maps every filled source cell and the gold dot together. The valid drawing preserves the exact cell count and shape relationships. Check the uppermost spur before comparing the lower branch. The other options show illegal orientation, mirror, altered geometry, or moved marker.
A: Incorrect: this option applies no rotation instead of the requested transformation. Check the uppermost spur before comparing the lower branch.
B (correct): Correct: A 180° rotation (no reflection) maps every filled source cell and the gold dot together. The valid drawing preserves the exact cell count and shape relationships. Check the uppermost spur before comparing the lower branch. The other options show illegal orientation, mirror, altered geometry, or moved marker.
C: Incorrect: this option applies a counterclockwise turn instead of the requested transformation. Check the uppermost spur before comparing the lower branch.
D: Incorrect: this option applies a clockwise turn instead of the requested transformation. Check the uppermost spur before comparing the lower branch.
Question 28 of 40 · medium
Scan the SOURCE diagram and apply a 180° rotation (no reflection). Which option displays the resulting marked shape? The gold dot must travel with the same marked square.
Show the answer
Answer: D
A 180° rotation (no reflection) maps every filled source cell and the gold dot together. The valid drawing preserves the exact cell count and shape relationships. The gold dot must travel with the same marked square. The other options show illegal orientation, mirror, altered geometry, or moved marker.
A: Incorrect: this option applies a clockwise turn instead of the requested transformation. The gold dot must travel with the same marked square.
B: Incorrect: this option applies no rotation instead of the requested transformation. The gold dot must travel with the same marked square.
C: Incorrect: this option applies a counterclockwise turn instead of the requested transformation. The gold dot must travel with the same marked square.
D (correct): Correct: A 180° rotation (no reflection) maps every filled source cell and the gold dot together. The valid drawing preserves the exact cell count and shape relationships. The gold dot must travel with the same marked square. The other options show illegal orientation, mirror, altered geometry, or moved marker.
Question 29 of 40 · medium
Scan the SOURCE diagram and apply a 180° rotation (no reflection). Which option displays the resulting marked shape? A mirror cannot replace the requested rigid operation.
Show the answer
Answer: D
A 180° rotation (no reflection) maps every filled source cell and the gold dot together. The valid drawing preserves the exact cell count and shape relationships. A mirror cannot replace the requested rigid operation. The other options show illegal orientation, mirror, altered geometry, or moved marker.
A: Incorrect: this option applies a clockwise turn instead of the requested transformation. A mirror cannot replace the requested rigid operation.
B: Incorrect: this option applies no rotation instead of the requested transformation. A mirror cannot replace the requested rigid operation.
C: Incorrect: this option applies a counterclockwise turn instead of the requested transformation. A mirror cannot replace the requested rigid operation.
D (correct): Correct: A 180° rotation (no reflection) maps every filled source cell and the gold dot together. The valid drawing preserves the exact cell count and shape relationships. A mirror cannot replace the requested rigid operation. The other options show illegal orientation, mirror, altered geometry, or moved marker.
Question 30 of 40 · medium
Scan the SOURCE diagram and apply a 180° rotation (no reflection). Which option displays the resulting marked shape? Pay attention to the single-square notch in the outline.
Show the answer
Answer: C
A 180° rotation (no reflection) maps every filled source cell and the gold dot together. The valid drawing preserves the exact cell count and shape relationships. Pay attention to the single-square notch in the outline. The other options show illegal orientation, mirror, altered geometry, or moved marker.
A: Incorrect: this option applies no rotation instead of the requested transformation. Pay attention to the single-square notch in the outline.
B: Incorrect: this option applies a counterclockwise turn instead of the requested transformation. Pay attention to the single-square notch in the outline.
C (correct): Correct: A 180° rotation (no reflection) maps every filled source cell and the gold dot together. The valid drawing preserves the exact cell count and shape relationships. Pay attention to the single-square notch in the outline. The other options show illegal orientation, mirror, altered geometry, or moved marker.
D: Incorrect: this option applies a clockwise turn instead of the requested transformation. Pay attention to the single-square notch in the outline.
Question 31 of 40 · hard
Scan the SOURCE diagram and apply a 180° rotation (no reflection). Which option displays the resulting marked shape? Reject any candidate with an added or missing occupied square.
Show the answer
Answer: C
A 180° rotation (no reflection) maps every filled source cell and the gold dot together. The valid drawing preserves the exact cell count and shape relationships. Reject any candidate with an added or missing occupied square. The other options show illegal orientation, mirror, altered geometry, or moved marker.
A: Incorrect: this option applies no rotation instead of the requested transformation. Reject any candidate with an added or missing occupied square.
B: Incorrect: this option applies a counterclockwise turn instead of the requested transformation. Reject any candidate with an added or missing occupied square.
C (correct): Correct: A 180° rotation (no reflection) maps every filled source cell and the gold dot together. The valid drawing preserves the exact cell count and shape relationships. Reject any candidate with an added or missing occupied square. The other options show illegal orientation, mirror, altered geometry, or moved marker.
D: Incorrect: this option applies a clockwise turn instead of the requested transformation. Reject any candidate with an added or missing occupied square.
Question 32 of 40 · hard
Scan the SOURCE diagram and apply a 180° rotation (no reflection). Which option displays the resulting marked shape? The figure may move within a card; absolute position is irrelevant.
Show the answer
Answer: D
A 180° rotation (no reflection) maps every filled source cell and the gold dot together. The valid drawing preserves the exact cell count and shape relationships. The figure may move within a card; absolute position is irrelevant. The other options show illegal orientation, mirror, altered geometry, or moved marker.
A: Incorrect: this option applies no rotation instead of the requested transformation. The figure may move within a card; absolute position is irrelevant.
B: Incorrect: this option applies a counterclockwise turn instead of the requested transformation. The figure may move within a card; absolute position is irrelevant.
C: Incorrect: this option applies a clockwise turn instead of the requested transformation. The figure may move within a card; absolute position is irrelevant.
D (correct): Correct: A 180° rotation (no reflection) maps every filled source cell and the gold dot together. The valid drawing preserves the exact cell count and shape relationships. The figure may move within a card; absolute position is irrelevant. The other options show illegal orientation, mirror, altered geometry, or moved marker.
Question 33 of 40 · hard
Scan the SOURCE diagram and apply a 180° rotation (no reflection). Which option displays the resulting marked shape? Use the longest arm first and the marked cell as confirmation.
Show the answer
Answer: B
A 180° rotation (no reflection) maps every filled source cell and the gold dot together. The valid drawing preserves the exact cell count and shape relationships. Use the longest arm first and the marked cell as confirmation. The other options show illegal orientation, mirror, altered geometry, or moved marker.
A: Incorrect: this option applies a counterclockwise turn instead of the requested transformation. Use the longest arm first and the marked cell as confirmation.
B (correct): Correct: A 180° rotation (no reflection) maps every filled source cell and the gold dot together. The valid drawing preserves the exact cell count and shape relationships. Use the longest arm first and the marked cell as confirmation. The other options show illegal orientation, mirror, altered geometry, or moved marker.
C: Incorrect: this option applies a clockwise turn instead of the requested transformation. Use the longest arm first and the marked cell as confirmation.
D: Incorrect: this option applies no rotation instead of the requested transformation. Use the longest arm first and the marked cell as confirmation.
Question 34 of 40 · hard
Scan the SOURCE diagram and apply a 90° COUNTERCLOCKWISE rotation (no reflection). Which option displays the resulting marked shape? Check the uppermost spur before comparing the lower branch.
Show the answer
Answer: A
A 90° COUNTERCLOCKWISE rotation (no reflection) maps every filled source cell and the gold dot together. The valid drawing preserves the exact cell count and shape relationships. Check the uppermost spur before comparing the lower branch. The other options show illegal orientation, mirror, altered geometry, or moved marker.
A (correct): Correct: A 90° COUNTERCLOCKWISE rotation (no reflection) maps every filled source cell and the gold dot together. The valid drawing preserves the exact cell count and shape relationships. Check the uppermost spur before comparing the lower branch. The other options show illegal orientation, mirror, altered geometry, or moved marker.
B: Incorrect: this option applies a half-turn instead of the requested transformation. Check the uppermost spur before comparing the lower branch.
C: Incorrect: this option applies a clockwise turn instead of the requested transformation. Check the uppermost spur before comparing the lower branch.
D: Incorrect: this option applies no rotation instead of the requested transformation. Check the uppermost spur before comparing the lower branch.
Question 35 of 40 · hard
Scan the SOURCE diagram and apply a 90° COUNTERCLOCKWISE rotation (no reflection). Which option displays the resulting marked shape? The gold dot must travel with the same marked square.
Show the answer
Answer: A
A 90° COUNTERCLOCKWISE rotation (no reflection) maps every filled source cell and the gold dot together. The valid drawing preserves the exact cell count and shape relationships. The gold dot must travel with the same marked square. The other options show illegal orientation, mirror, altered geometry, or moved marker.
A (correct): Correct: A 90° COUNTERCLOCKWISE rotation (no reflection) maps every filled source cell and the gold dot together. The valid drawing preserves the exact cell count and shape relationships. The gold dot must travel with the same marked square. The other options show illegal orientation, mirror, altered geometry, or moved marker.
B: Incorrect: this option applies a clockwise turn instead of the requested transformation. The gold dot must travel with the same marked square.
C: Incorrect: this option applies no rotation instead of the requested transformation. The gold dot must travel with the same marked square.
D: Incorrect: this option applies a half-turn instead of the requested transformation. The gold dot must travel with the same marked square.
Question 36 of 40 · hard
Scan the SOURCE diagram and apply a 90° COUNTERCLOCKWISE rotation (no reflection). Which option displays the resulting marked shape? A mirror cannot replace the requested rigid operation.
Show the answer
Answer: C
A 90° COUNTERCLOCKWISE rotation (no reflection) maps every filled source cell and the gold dot together. The valid drawing preserves the exact cell count and shape relationships. A mirror cannot replace the requested rigid operation. The other options show illegal orientation, mirror, altered geometry, or moved marker.
A: Incorrect: this option applies no rotation instead of the requested transformation. A mirror cannot replace the requested rigid operation.
B: Incorrect: this option applies a half-turn instead of the requested transformation. A mirror cannot replace the requested rigid operation.
C (correct): Correct: A 90° COUNTERCLOCKWISE rotation (no reflection) maps every filled source cell and the gold dot together. The valid drawing preserves the exact cell count and shape relationships. A mirror cannot replace the requested rigid operation. The other options show illegal orientation, mirror, altered geometry, or moved marker.
D: Incorrect: this option applies a clockwise turn instead of the requested transformation. A mirror cannot replace the requested rigid operation.
Question 37 of 40 · hard
Scan the SOURCE diagram and apply a 90° COUNTERCLOCKWISE rotation (no reflection). Which option displays the resulting marked shape? Pay attention to the single-square notch in the outline.
Show the answer
Answer: A
A 90° COUNTERCLOCKWISE rotation (no reflection) maps every filled source cell and the gold dot together. The valid drawing preserves the exact cell count and shape relationships. Pay attention to the single-square notch in the outline. The other options show illegal orientation, mirror, altered geometry, or moved marker.
A (correct): Correct: A 90° COUNTERCLOCKWISE rotation (no reflection) maps every filled source cell and the gold dot together. The valid drawing preserves the exact cell count and shape relationships. Pay attention to the single-square notch in the outline. The other options show illegal orientation, mirror, altered geometry, or moved marker.
B: Incorrect: this option applies a clockwise turn instead of the requested transformation. Pay attention to the single-square notch in the outline.
C: Incorrect: this option applies no rotation instead of the requested transformation. Pay attention to the single-square notch in the outline.
D: Incorrect: this option applies a half-turn instead of the requested transformation. Pay attention to the single-square notch in the outline.
Question 38 of 40 · hard
Scan the SOURCE diagram and apply a 90° COUNTERCLOCKWISE rotation (no reflection). Which option displays the resulting marked shape? Reject any candidate with an added or missing occupied square.
Show the answer
Answer: B
A 90° COUNTERCLOCKWISE rotation (no reflection) maps every filled source cell and the gold dot together. The valid drawing preserves the exact cell count and shape relationships. Reject any candidate with an added or missing occupied square. The other options show illegal orientation, mirror, altered geometry, or moved marker.
A: Incorrect: this option applies a clockwise turn instead of the requested transformation. Reject any candidate with an added or missing occupied square.
B (correct): Correct: A 90° COUNTERCLOCKWISE rotation (no reflection) maps every filled source cell and the gold dot together. The valid drawing preserves the exact cell count and shape relationships. Reject any candidate with an added or missing occupied square. The other options show illegal orientation, mirror, altered geometry, or moved marker.
C: Incorrect: this option applies a half-turn instead of the requested transformation. Reject any candidate with an added or missing occupied square.
D: Incorrect: this option applies no rotation instead of the requested transformation. Reject any candidate with an added or missing occupied square.
Question 39 of 40 · hard
Scan the SOURCE diagram and apply a 90° COUNTERCLOCKWISE rotation (no reflection). Which option displays the resulting marked shape? The figure may move within a card; absolute position is irrelevant.
Show the answer
Answer: A
A 90° COUNTERCLOCKWISE rotation (no reflection) maps every filled source cell and the gold dot together. The valid drawing preserves the exact cell count and shape relationships. The figure may move within a card; absolute position is irrelevant. The other options show illegal orientation, mirror, altered geometry, or moved marker.
A (correct): Correct: A 90° COUNTERCLOCKWISE rotation (no reflection) maps every filled source cell and the gold dot together. The valid drawing preserves the exact cell count and shape relationships. The figure may move within a card; absolute position is irrelevant. The other options show illegal orientation, mirror, altered geometry, or moved marker.
B: Incorrect: this option applies a half-turn instead of the requested transformation. The figure may move within a card; absolute position is irrelevant.
C: Incorrect: this option applies a clockwise turn instead of the requested transformation. The figure may move within a card; absolute position is irrelevant.
D: Incorrect: this option applies no rotation instead of the requested transformation. The figure may move within a card; absolute position is irrelevant.
Question 40 of 40 · hard
Scan the SOURCE diagram and apply a 90° COUNTERCLOCKWISE rotation (no reflection). Which option displays the resulting marked shape? Use the longest arm first and the marked cell as confirmation.
Show the answer
Answer: B
A 90° COUNTERCLOCKWISE rotation (no reflection) maps every filled source cell and the gold dot together. The valid drawing preserves the exact cell count and shape relationships. Use the longest arm first and the marked cell as confirmation. The other options show illegal orientation, mirror, altered geometry, or moved marker.
A: Incorrect: this option applies a half-turn instead of the requested transformation. Use the longest arm first and the marked cell as confirmation.
B (correct): Correct: A 90° COUNTERCLOCKWISE rotation (no reflection) maps every filled source cell and the gold dot together. The valid drawing preserves the exact cell count and shape relationships. Use the longest arm first and the marked cell as confirmation. The other options show illegal orientation, mirror, altered geometry, or moved marker.
C: Incorrect: this option applies no rotation instead of the requested transformation. Use the longest arm first and the marked cell as confirmation.
D: Incorrect: this option applies a clockwise turn instead of the requested transformation. Use the longest arm first and the marked cell as confirmation.
The left box shows two shapes, each with a lettered point, and a line with the same two letters on its ends. Which figure shows how the shapes connect when each end of the line is attached to the point with the same letter?
Show the answer
Answer: B
Check one letter at a time. Point V is at the sharpest corner of the right triangle, and point W is at the middle of the short side of the trapezoid. Cross out any figure where either end of the line lands somewhere else or where a shape has changed. The shapes may be turned, so find each point by its place on the shape (corner, middle of a side, center), not by up, down, left or right.
A: The line ends in the wrong place: it meets the trapezoid at the middle of the long side, but point W is at the middle of the short side.
B (correct): The line joins the sharpest corner of the right triangle to the middle of the short side of the trapezoid, the same spots as points V and W in the left box; turning a shape does not move a point on it.
C: The line ends in the wrong place: it meets the right triangle at the right-angle corner, but point V is at the sharpest corner.
D: The line ends in the wrong place: it meets the right triangle at the middle of the slanted side, but point V is at the sharpest corner and it meets the trapezoid at the middle of the long side, but point W is at the middle of the short side.
Practice 2 of 80 · medium
The left box shows two shapes, each with a lettered point, and a line with the same two letters on its ends. Which figure shows how the shapes connect when each end of the line is attached to the point with the same letter?
Show the answer
Answer: D
Check one letter at a time. Point G is at the top of the curved side of the half-circle, and point H is at the middle of a long side of the parallelogram. Cross out any figure where either end of the line lands somewhere else or where a shape has changed. The shapes may be turned, so find each point by its place on the shape (corner, middle of a side, center), not by up, down, left or right.
A: One of the shapes here is a rectangle, but the left box has a parallelogram. Joining parts never changes a shape.
B: The line ends in the wrong place: it meets the half-circle at a corner of the flat side, but point G is at the top of the curved side.
C: The line ends in the wrong place: it meets the half-circle at the middle of the flat side, but point G is at the top of the curved side.
D (correct): The line joins the top of the curved side of the half-circle to the middle of a long side of the parallelogram, the same spots as points G and H in the left box; turning a shape does not move a point on it.
Practice 3 of 80 · hard
The left box shows two shapes, each with a lettered point, and a line with the same two letters on its ends. Which figure shows how the shapes connect when each end of the line is attached to the point with the same letter?
Show the answer
Answer: D
Check one letter at a time. Point T is at the sharpest corner of the right triangle, and point U is at the center of the triangle. Cross out any figure where either end of the line lands somewhere else or where a shape has changed. The shapes may be turned, so find each point by its place on the shape (corner, middle of a side, center), not by up, down, left or right.
A: The line ends in the wrong place: it meets the right triangle at the middle of the slanted side, but point T is at the sharpest corner.
B: The line ends in the wrong place: it meets the right triangle at the middle of the shorter leg, but point T is at the sharpest corner and it meets the triangle at a corner, but point U is at the center.
C: The line ends in the wrong place: it meets the triangle at a corner, but point U is at the center.
D (correct): The line joins the sharpest corner of the right triangle to the center of the triangle, the same spots as points T and U in the left box; turning a shape does not move a point on it.
Practice 4 of 80 · medium
The left box shows two shapes, each with a lettered point, and a line with the same two letters on its ends. Which figure shows how the shapes connect when each end of the line is attached to the point with the same letter?
Show the answer
Answer: C
Check one letter at a time. Point G is at a sharp corner of the diamond, and point H is at a corner of the triangle. Cross out any figure where either end of the line lands somewhere else or where a shape has changed. The shapes may be turned, so find each point by its place on the shape (corner, middle of a side, center), not by up, down, left or right.
A: The line ends in the wrong place: it meets the diamond at the center, but point G is at a sharp corner.
B: The line ends in the wrong place: it meets the triangle at the middle of a side, but point H is at a corner.
C (correct): The line joins a sharp corner of the diamond to a corner of the triangle, the same spots as points G and H in the left box; turning a shape does not move a point on it.
D: The line ends in the wrong place: it meets the triangle at the center, but point H is at a corner.
Practice 5 of 80 · easy
The left box shows two shapes, each with a lettered point, and a line with the same two letters on its ends. Which figure shows how the shapes connect when each end of the line is attached to the point with the same letter?
Show the answer
Answer: A
Check one letter at a time. Point P is at the right-angle corner of the right triangle, and point Q is at the middle of a long side of the parallelogram. Cross out any figure where either end of the line lands somewhere else or where a shape has changed. The shapes may be turned, so find each point by its place on the shape (corner, middle of a side, center), not by up, down, left or right.
A (correct): The line joins the right-angle corner of the right triangle to the middle of a long side of the parallelogram, the same spots as points P and Q in the left box; turning a shape does not move a point on it.
B: The line ends in the wrong place: it meets the parallelogram at the middle of a short side, but point Q is at the middle of a long side.
C: The line ends in the wrong place: it meets the right triangle at the middle of the shorter leg, but point P is at the right-angle corner and it meets the parallelogram at the middle of a short side, but point Q is at the middle of a long side.
D: The line ends in the wrong place: it meets the right triangle at the sharpest corner, but point P is at the right-angle corner.
Practice 6 of 80 · easy
The left box shows two shapes, each with a lettered point, and a line with the same two letters on its ends. Which figure shows how the shapes connect when each end of the line is attached to the point with the same letter?
Show the answer
Answer: B
Check one letter at a time. Point P is at the center of the square, and point Q is at a corner of the triangle. Cross out any figure where either end of the line lands somewhere else or where a shape has changed. The shapes may be turned, so find each point by its place on the shape (corner, middle of a side, center), not by up, down, left or right.
A: The line ends in the wrong place: it meets the square at a corner, but point P is at the center.
B (correct): The line joins the center of the square to a corner of the triangle, the same spots as points P and Q in the left box; turning a shape does not move a point on it.
C: The line ends in the wrong place: it meets the square at the middle of a side, but point P is at the center.
D: The line ends in the wrong place: it meets the square at the middle of a side, but point P is at the center and it meets the triangle at the middle of a side, but point Q is at a corner.
Practice 7 of 80 · hard
The left box shows two shapes, each with a lettered point, and a line with the same two letters on its ends. Which figure shows how the shapes connect when each end of the line is attached to the point with the same letter?
Show the answer
Answer: B
Check one letter at a time. Point J is at the top of the curved side of the half-circle, and point K is at the sharpest corner of the right triangle. Cross out any figure where either end of the line lands somewhere else or where a shape has changed. The shapes may be turned, so find each point by its place on the shape (corner, middle of a side, center), not by up, down, left or right.
A: The line ends in the wrong place: it meets the right triangle at the middle of the shorter leg, but point K is at the sharpest corner.
B (correct): The line joins the top of the curved side of the half-circle to the sharpest corner of the right triangle, the same spots as points J and K in the left box; turning a shape does not move a point on it.
C: The line ends in the wrong place: it meets the half-circle at the middle of the flat side, but point J is at the top of the curved side.
D: The line ends in the wrong place: it meets the half-circle at the middle of the flat side, but point J is at the top of the curved side and it meets the right triangle at the middle of the shorter leg, but point K is at the sharpest corner.
Practice 8 of 80 · easy
The left box shows two shapes, each with a lettered point, and a line with the same two letters on its ends. Which figure shows how the shapes connect when each end of the line is attached to the point with the same letter?
Show the answer
Answer: C
Check one letter at a time. Point R is at the middle of the short side of the trapezoid, and point S is at the middle of the bottom side of the house shape. Cross out any figure where either end of the line lands somewhere else or where a shape has changed. The shapes may be turned, so find each point by its place on the shape (corner, middle of a side, center), not by up, down, left or right.
A: The line ends in the wrong place: it meets the trapezoid at the middle of the long side, but point R is at the middle of the short side.
B: The line ends in the wrong place: it meets the house shape at a corner where the roof meets a wall, but point S is at the middle of the bottom side.
C (correct): The line joins the middle of the short side of the trapezoid to the middle of the bottom side of the house shape, the same spots as points R and S in the left box; turning a shape does not move a point on it.
D: The line ends in the wrong place: it meets the trapezoid at a corner of the long side, but point R is at the middle of the short side and it meets the house shape at a bottom corner, but point S is at the middle of the bottom side.
Practice 9 of 80 · hard
The left box shows two shapes, each with a lettered point, and a line with the same two letters on its ends. Which figure shows how the shapes connect when each end of the line is attached to the point with the same letter?
Show the answer
Answer: C
Check one letter at a time. Point K is at the middle of the short side of the trapezoid, and point L is at a corner of the flat side of the half-circle. Cross out any figure where either end of the line lands somewhere else or where a shape has changed. The shapes may be turned, so find each point by its place on the shape (corner, middle of a side, center), not by up, down, left or right.
A: The line ends in the wrong place: it meets the trapezoid at a corner of the long side, but point K is at the middle of the short side and it meets the half-circle at the middle of the flat side, but point L is at a corner of the flat side.
B: The line ends in the wrong place: it meets the trapezoid at a corner of the long side, but point K is at the middle of the short side.
C (correct): The line joins the middle of the short side of the trapezoid to a corner of the flat side of the half-circle, the same spots as points K and L in the left box; turning a shape does not move a point on it.
D: The line ends in the wrong place: it meets the trapezoid at the middle of a slanted side, but point K is at the middle of the short side.
Practice 10 of 80 · medium
The left box shows two shapes, each with a lettered point, and a line with the same two letters on its ends. Which figure shows how the shapes connect when each end of the line is attached to the point with the same letter?
Show the answer
Answer: B
Check one letter at a time. Point J is at a corner of the long side of the trapezoid, and point K is at a corner of the hexagon. Cross out any figure where either end of the line lands somewhere else or where a shape has changed. The shapes may be turned, so find each point by its place on the shape (corner, middle of a side, center), not by up, down, left or right.
A: One of the shapes here is a pentagon, but the left box has a hexagon. Joining parts never changes a shape.
B (correct): The line joins a corner of the long side of the trapezoid to a corner of the hexagon, the same spots as points J and K in the left box; turning a shape does not move a point on it.
C: The line ends in the wrong place: it meets the hexagon at the center, but point K is at a corner.
D: The line ends in the wrong place: it meets the trapezoid at the middle of the long side, but point J is at a corner of the long side.
Practice 11 of 80 · medium
The left box shows two shapes, each with a lettered point, and a line with the same two letters on its ends. Which figure shows how the shapes connect when each end of the line is attached to the point with the same letter?
Show the answer
Answer: A
Check one letter at a time. Point T is at a sharp corner of the diamond, and point U is at the middle of a side of the triangle. Cross out any figure where either end of the line lands somewhere else or where a shape has changed. The shapes may be turned, so find each point by its place on the shape (corner, middle of a side, center), not by up, down, left or right.
A (correct): The line joins a sharp corner of the diamond to the middle of a side of the triangle, the same spots as points T and U in the left box; turning a shape does not move a point on it.
B: The line ends in the wrong place: it meets the diamond at a wide corner, but point T is at a sharp corner and it meets the triangle at a corner, but point U is at the middle of a side.
C: The line ends in the wrong place: it meets the triangle at the center, but point U is at the middle of a side.
D: The line ends in the wrong place: it meets the diamond at the middle of a side, but point T is at a sharp corner.
Practice 12 of 80 · easy
The left box shows two shapes, each with a lettered point, and a line with the same two letters on its ends. Which figure shows how the shapes connect when each end of the line is attached to the point with the same letter?
Show the answer
Answer: C
Check one letter at a time. Point R is at a corner of the pentagon, and point S is at the center of the rectangle. Cross out any figure where either end of the line lands somewhere else or where a shape has changed. The shapes may be turned, so find each point by its place on the shape (corner, middle of a side, center), not by up, down, left or right.
A: The line ends in the wrong place: it meets the rectangle at the middle of a long side, but point S is at the center.
B: The line ends in the wrong place: it meets the pentagon at the center, but point R is at a corner and it meets the rectangle at a corner, but point S is at the center.
C (correct): The line joins a corner of the pentagon to the center of the rectangle, the same spots as points R and S in the left box; turning a shape does not move a point on it.
D: The line ends in the wrong place: it meets the rectangle at the middle of a short side, but point S is at the center.
Practice 13 of 80 · hard
The left box shows two shapes, each with a lettered point, and a line with the same two letters on its ends. Which figure shows how the shapes connect when each end of the line is attached to the point with the same letter?
Show the answer
Answer: B
Check one letter at a time. Point M is at a wide corner of the diamond, and point N is at a corner of the square. Cross out any figure where either end of the line lands somewhere else or where a shape has changed. The shapes may be turned, so find each point by its place on the shape (corner, middle of a side, center), not by up, down, left or right.
A: The line ends in the wrong place: it meets the diamond at the center, but point M is at a wide corner.
B (correct): The line joins a wide corner of the diamond to a corner of the square, the same spots as points M and N in the left box; turning a shape does not move a point on it.
C: One of the shapes here is a rectangle, but the left box has a square. Joining parts never changes a shape.
D: The line ends in the wrong place: it meets the diamond at the middle of a side, but point M is at a wide corner.
Practice 14 of 80 · medium
The left box shows two shapes, each with a lettered point, and a line with the same two letters on its ends. Which figure shows how the shapes connect when each end of the line is attached to the point with the same letter?
Show the answer
Answer: A
Check one letter at a time. Point G is at a corner of the triangle, and point H is at the middle of a side of the diamond. Cross out any figure where either end of the line lands somewhere else or where a shape has changed. The shapes may be turned, so find each point by its place on the shape (corner, middle of a side, center), not by up, down, left or right.
A (correct): The line joins a corner of the triangle to the middle of a side of the diamond, the same spots as points G and H in the left box; turning a shape does not move a point on it.
B: One of the shapes here is a square, but the left box has a diamond. Joining parts never changes a shape.
C: The line ends in the wrong place: it meets the triangle at the center, but point G is at a corner.
D: The line ends in the wrong place: it meets the diamond at a wide corner, but point H is at the middle of a side.
Practice 15 of 80 · hard
The left box shows two shapes, each with a lettered point, and a line with the same two letters on its ends. Which figure shows how the shapes connect when each end of the line is attached to the point with the same letter?
Show the answer
Answer: A
Check one letter at a time. Point G is at the middle of a side of the diamond, and point H is at the peak of the roof of the house shape. Cross out any figure where either end of the line lands somewhere else or where a shape has changed. The shapes may be turned, so find each point by its place on the shape (corner, middle of a side, center), not by up, down, left or right.
A (correct): The line joins the middle of a side of the diamond to the peak of the roof of the house shape, the same spots as points G and H in the left box; turning a shape does not move a point on it.
B: One of the shapes here is a square, but the left box has a diamond. Joining parts never changes a shape.
C: The line ends in the wrong place: it meets the diamond at a sharp corner, but point G is at the middle of a side.
D: The line ends in the wrong place: it meets the house shape at the middle of the bottom side, but point H is at the peak of the roof.
Practice 16 of 80 · hard
The left box shows two shapes, each with a lettered point, and a line with the same two letters on its ends. Which figure shows how the shapes connect when each end of the line is attached to the point with the same letter?
Show the answer
Answer: D
Check one letter at a time. Point P is at the middle of the bottom side of the house shape, and point Q is at a corner of the hexagon. Cross out any figure where either end of the line lands somewhere else or where a shape has changed. The shapes may be turned, so find each point by its place on the shape (corner, middle of a side, center), not by up, down, left or right.
A: The line ends in the wrong place: it meets the house shape at a bottom corner, but point P is at the middle of the bottom side.
B: The line ends in the wrong place: it meets the hexagon at the center, but point Q is at a corner.
C: One of the shapes here is a pentagon, but the left box has a hexagon. Joining parts never changes a shape.
D (correct): The line joins the middle of the bottom side of the house shape to a corner of the hexagon, the same spots as points P and Q in the left box; turning a shape does not move a point on it.
Practice 17 of 80 · medium
The left box shows two shapes, each with a lettered point, and a line with the same two letters on its ends. Which figure shows how the shapes connect when each end of the line is attached to the point with the same letter?
Show the answer
Answer: A
Check one letter at a time. Point K is at a corner of the hexagon, and point L is at the center of the parallelogram. Cross out any figure where either end of the line lands somewhere else or where a shape has changed. The shapes may be turned, so find each point by its place on the shape (corner, middle of a side, center), not by up, down, left or right.
A (correct): The line joins a corner of the hexagon to the center of the parallelogram, the same spots as points K and L in the left box; turning a shape does not move a point on it.
B: One of the shapes here is a pentagon, but the left box has a hexagon. Joining parts never changes a shape.
C: The line ends in the wrong place: it meets the parallelogram at the middle of a short side, but point L is at the center.
D: The line ends in the wrong place: it meets the parallelogram at a wide corner, but point L is at the center.
Practice 18 of 80 · easy
The left box shows two shapes, each with a lettered point, and a line with the same two letters on its ends. Which figure shows how the shapes connect when each end of the line is attached to the point with the same letter?
Show the answer
Answer: C
Check one letter at a time. Point T is at the middle of a side of the pentagon, and point U is at the center of the parallelogram. Cross out any figure where either end of the line lands somewhere else or where a shape has changed. The shapes may be turned, so find each point by its place on the shape (corner, middle of a side, center), not by up, down, left or right.
A: The line ends in the wrong place: it meets the pentagon at a corner, but point T is at the middle of a side and it meets the parallelogram at a wide corner, but point U is at the center.
B: The line ends in the wrong place: it meets the parallelogram at a wide corner, but point U is at the center.
C (correct): The line joins the middle of a side of the pentagon to the center of the parallelogram, the same spots as points T and U in the left box; turning a shape does not move a point on it.
D: The line ends in the wrong place: it meets the parallelogram at the middle of a short side, but point U is at the center.
Practice 19 of 80 · medium
The left box shows two shapes, each with a lettered point, and a line with the same two letters on its ends. Which figure shows how the shapes connect when each end of the line is attached to the point with the same letter?
Show the answer
Answer: D
Check one letter at a time. Point E is at the middle of a long side of the rectangle, and point F is at the right-angle corner of the right triangle. Cross out any figure where either end of the line lands somewhere else or where a shape has changed. The shapes may be turned, so find each point by its place on the shape (corner, middle of a side, center), not by up, down, left or right.
A: The line ends in the wrong place: it meets the rectangle at the center, but point E is at the middle of a long side.
B: The line ends in the wrong place: it meets the right triangle at the sharpest corner, but point F is at the right-angle corner.
C: One of the shapes here is a parallelogram, but the left box has a rectangle. Joining parts never changes a shape.
D (correct): The line joins the middle of a long side of the rectangle to the right-angle corner of the right triangle, the same spots as points E and F in the left box; turning a shape does not move a point on it.
Practice 20 of 80 · medium
The left box shows two shapes, each with a lettered point, and a line with the same two letters on its ends. Which figure shows how the shapes connect when each end of the line is attached to the point with the same letter?
Show the answer
Answer: D
Check one letter at a time. Point T is at a corner of the triangle, and point U is at the middle of a side of the square. Cross out any figure where either end of the line lands somewhere else or where a shape has changed. The shapes may be turned, so find each point by its place on the shape (corner, middle of a side, center), not by up, down, left or right.
A: The line ends in the wrong place: it meets the square at a corner, but point U is at the middle of a side.
B: The line ends in the wrong place: it meets the triangle at the middle of a side, but point T is at a corner.
C: One of the shapes here is a diamond, but the left box has a square. Joining parts never changes a shape.
D (correct): The line joins a corner of the triangle to the middle of a side of the square, the same spots as points T and U in the left box; turning a shape does not move a point on it.
Practice 21 of 80 · medium
The left box shows two shapes, each with a lettered point, and a line with the same two letters on its ends. Which figure shows how the shapes connect when each end of the line is attached to the point with the same letter?
Show the answer
Answer: A
Check one letter at a time. Point K is at the middle of the long side of the trapezoid, and point L is at a sharp corner of the diamond. Cross out any figure where either end of the line lands somewhere else or where a shape has changed. The shapes may be turned, so find each point by its place on the shape (corner, middle of a side, center), not by up, down, left or right.
A (correct): The line joins the middle of the long side of the trapezoid to a sharp corner of the diamond, the same spots as points K and L in the left box; turning a shape does not move a point on it.
B: The line ends in the wrong place: it meets the trapezoid at a corner of the short side, but point K is at the middle of the long side and it meets the diamond at the center, but point L is at a sharp corner.
C: The line ends in the wrong place: it meets the diamond at the middle of a side, but point L is at a sharp corner.
D: The line ends in the wrong place: it meets the trapezoid at a corner of the short side, but point K is at the middle of the long side.
Practice 22 of 80 · easy
The left box shows two shapes, each with a lettered point, and a line with the same two letters on its ends. Which figure shows how the shapes connect when each end of the line is attached to the point with the same letter?
Show the answer
Answer: C
Check one letter at a time. Point G is at the sharpest corner of the right triangle, and point H is at the center of the pentagon. Cross out any figure where either end of the line lands somewhere else or where a shape has changed. The shapes may be turned, so find each point by its place on the shape (corner, middle of a side, center), not by up, down, left or right.
A: The line ends in the wrong place: it meets the right triangle at the middle of the longer leg, but point G is at the sharpest corner.
B: The line ends in the wrong place: it meets the right triangle at the middle of the shorter leg, but point G is at the sharpest corner and it meets the pentagon at a corner, but point H is at the center.
C (correct): The line joins the sharpest corner of the right triangle to the center of the pentagon, the same spots as points G and H in the left box; turning a shape does not move a point on it.
D: The line ends in the wrong place: it meets the right triangle at the right-angle corner, but point G is at the sharpest corner.
Practice 23 of 80 · medium
The left box shows two shapes, each with a lettered point, and a line with the same two letters on its ends. Which figure shows how the shapes connect when each end of the line is attached to the point with the same letter?
Show the answer
Answer: A
Check one letter at a time. Point J is at a corner of the long side of the trapezoid, and point K is at a corner of the triangle. Cross out any figure where either end of the line lands somewhere else or where a shape has changed. The shapes may be turned, so find each point by its place on the shape (corner, middle of a side, center), not by up, down, left or right.
A (correct): The line joins a corner of the long side of the trapezoid to a corner of the triangle, the same spots as points J and K in the left box; turning a shape does not move a point on it.
B: The line ends in the wrong place: it meets the trapezoid at the middle of the short side, but point J is at a corner of the long side.
C: The line ends in the wrong place: it meets the trapezoid at a corner of the short side, but point J is at a corner of the long side.
D: The line ends in the wrong place: it meets the trapezoid at the middle of a slanted side, but point J is at a corner of the long side and it meets the triangle at the center, but point K is at a corner.
Practice 24 of 80 · medium
The left box shows two shapes, each with a lettered point, and a line with the same two letters on its ends. Which figure shows how the shapes connect when each end of the line is attached to the point with the same letter?
Show the answer
Answer: A
Check one letter at a time. Point M is at the middle of the bottom side of the house shape, and point N is at a corner of the triangle. Cross out any figure where either end of the line lands somewhere else or where a shape has changed. The shapes may be turned, so find each point by its place on the shape (corner, middle of a side, center), not by up, down, left or right.
A (correct): The line joins the middle of the bottom side of the house shape to a corner of the triangle, the same spots as points M and N in the left box; turning a shape does not move a point on it.
B: The line ends in the wrong place: it meets the house shape at the middle of a wall, but point M is at the middle of the bottom side.
C: The line ends in the wrong place: it meets the house shape at the peak of the roof, but point M is at the middle of the bottom side and it meets the triangle at the middle of a side, but point N is at a corner.
D: The line ends in the wrong place: it meets the house shape at a corner where the roof meets a wall, but point M is at the middle of the bottom side.
Practice 25 of 80 · medium
The left box shows two shapes, each with a lettered point, and a line with the same two letters on its ends. Which figure shows how the shapes connect when each end of the line is attached to the point with the same letter?
Show the answer
Answer: C
Check one letter at a time. Point T is at the center of the triangle, and point U is at a corner of the rectangle. Cross out any figure where either end of the line lands somewhere else or where a shape has changed. The shapes may be turned, so find each point by its place on the shape (corner, middle of a side, center), not by up, down, left or right.
A: The line ends in the wrong place: it meets the rectangle at the center, but point U is at a corner.
B: The line ends in the wrong place: it meets the rectangle at the middle of a short side, but point U is at a corner.
C (correct): The line joins the center of the triangle to a corner of the rectangle, the same spots as points T and U in the left box; turning a shape does not move a point on it.
D: One of the shapes here is a square, but the left box has a rectangle. Joining parts never changes a shape.
Practice 26 of 80 · hard
The left box shows two shapes, each with a lettered point, and a line with the same two letters on its ends. Which figure shows how the shapes connect when each end of the line is attached to the point with the same letter?
Show the answer
Answer: B
Check one letter at a time. Point M is at the middle of a side of the diamond, and point N is at the top of the curved side of the half-circle. Cross out any figure where either end of the line lands somewhere else or where a shape has changed. The shapes may be turned, so find each point by its place on the shape (corner, middle of a side, center), not by up, down, left or right.
A: The line ends in the wrong place: it meets the diamond at a sharp corner, but point M is at the middle of a side.
B (correct): The line joins the middle of a side of the diamond to the top of the curved side of the half-circle, the same spots as points M and N in the left box; turning a shape does not move a point on it.
C: One of the shapes here is a square, but the left box has a diamond. Joining parts never changes a shape.
D: The line ends in the wrong place: it meets the half-circle at the middle of the flat side, but point N is at the top of the curved side.
Practice 27 of 80 · easy
The left box shows two shapes, each with a lettered point, and a line with the same two letters on its ends. Which figure shows how the shapes connect when each end of the line is attached to the point with the same letter?
Show the answer
Answer: B
Check one letter at a time. Point T is at the right-angle corner of the right triangle, and point U is at the center of the pentagon. Cross out any figure where either end of the line lands somewhere else or where a shape has changed. The shapes may be turned, so find each point by its place on the shape (corner, middle of a side, center), not by up, down, left or right.
A: The line ends in the wrong place: it meets the right triangle at the sharpest corner, but point T is at the right-angle corner and it meets the pentagon at a corner, but point U is at the center.
B (correct): The line joins the right-angle corner of the right triangle to the center of the pentagon, the same spots as points T and U in the left box; turning a shape does not move a point on it.
C: The line ends in the wrong place: it meets the right triangle at the middle of the shorter leg, but point T is at the right-angle corner.
D: The line ends in the wrong place: it meets the right triangle at the sharpest corner, but point T is at the right-angle corner.
Practice 28 of 80 · hard
The left box shows two shapes, each with a lettered point, and a line with the same two letters on its ends. Which figure shows how the shapes connect when each end of the line is attached to the point with the same letter?
Show the answer
Answer: C
Check one letter at a time. Point V is at the sharpest corner of the right triangle, and point W is at a corner of the short side of the trapezoid. Cross out any figure where either end of the line lands somewhere else or where a shape has changed. The shapes may be turned, so find each point by its place on the shape (corner, middle of a side, center), not by up, down, left or right.
A: The line ends in the wrong place: it meets the right triangle at the middle of the slanted side, but point V is at the sharpest corner.
B: The line ends in the wrong place: it meets the right triangle at the middle of the shorter leg, but point V is at the sharpest corner and it meets the trapezoid at the middle of a slanted side, but point W is at a corner of the short side.
C (correct): The line joins the sharpest corner of the right triangle to a corner of the short side of the trapezoid, the same spots as points V and W in the left box; turning a shape does not move a point on it.
D: The line ends in the wrong place: it meets the right triangle at the right-angle corner, but point V is at the sharpest corner.
Practice 29 of 80 · hard
The left box shows two shapes, each with a lettered point, and a line with the same two letters on its ends. Which figure shows how the shapes connect when each end of the line is attached to the point with the same letter?
Show the answer
Answer: D
Check one letter at a time. Point P is at the center of the square, and point Q is at the middle of a side of the diamond. Cross out any figure where either end of the line lands somewhere else or where a shape has changed. The shapes may be turned, so find each point by its place on the shape (corner, middle of a side, center), not by up, down, left or right.
A: The line ends in the wrong place: it meets the diamond at the center, but point Q is at the middle of a side.
B: The line ends in the wrong place: it meets the square at the middle of a side, but point P is at the center.
C: One of the shapes here is a rectangle, but the left box has a square. Joining parts never changes a shape.
D (correct): The line joins the center of the square to the middle of a side of the diamond, the same spots as points P and Q in the left box; turning a shape does not move a point on it.
Practice 30 of 80 · medium
The left box shows two shapes, each with a lettered point, and a line with the same two letters on its ends. Which figure shows how the shapes connect when each end of the line is attached to the point with the same letter?
Show the answer
Answer: D
Check one letter at a time. Point K is at the middle of a long side of the rectangle, and point L is at the top of the curved side of the half-circle. Cross out any figure where either end of the line lands somewhere else or where a shape has changed. The shapes may be turned, so find each point by its place on the shape (corner, middle of a side, center), not by up, down, left or right.
A: The line ends in the wrong place: it meets the rectangle at the middle of a short side, but point K is at the middle of a long side.
B: The line ends in the wrong place: it meets the rectangle at the center, but point K is at the middle of a long side.
C: One of the shapes here is a parallelogram, but the left box has a rectangle. Joining parts never changes a shape.
D (correct): The line joins the middle of a long side of the rectangle to the top of the curved side of the half-circle, the same spots as points K and L in the left box; turning a shape does not move a point on it.
Practice 31 of 80 · hard
The left box shows two shapes, each with a lettered point, and a line with the same two letters on its ends. Which figure shows how the shapes connect when each end of the line is attached to the point with the same letter?
Show the answer
Answer: B
Check one letter at a time. Point M is at the middle of a short side of the rectangle, and point N is at the middle of a side of the pentagon. Cross out any figure where either end of the line lands somewhere else or where a shape has changed. The shapes may be turned, so find each point by its place on the shape (corner, middle of a side, center), not by up, down, left or right.
A: One of the shapes here is a hexagon, but the left box has a pentagon. Joining parts never changes a shape.
B (correct): The line joins the middle of a short side of the rectangle to the middle of a side of the pentagon, the same spots as points M and N in the left box; turning a shape does not move a point on it.
C: The line ends in the wrong place: it meets the rectangle at the center, but point M is at the middle of a short side.
D: The line ends in the wrong place: it meets the pentagon at a corner, but point N is at the middle of a side.
Practice 32 of 80 · medium
The left box shows two shapes, each with a lettered point, and a line with the same two letters on its ends. Which figure shows how the shapes connect when each end of the line is attached to the point with the same letter?
Show the answer
Answer: A
Check one letter at a time. Point V is at a corner of the triangle, and point W is at the middle of the slanted side of the right triangle. Cross out any figure where either end of the line lands somewhere else or where a shape has changed. The shapes may be turned, so find each point by its place on the shape (corner, middle of a side, center), not by up, down, left or right.
A (correct): The line joins a corner of the triangle to the middle of the slanted side of the right triangle, the same spots as points V and W in the left box; turning a shape does not move a point on it.
B: The line ends in the wrong place: it meets the triangle at the center, but point V is at a corner.
C: The line ends in the wrong place: it meets the right triangle at the right-angle corner, but point W is at the middle of the slanted side.
D: The line ends in the wrong place: it meets the triangle at the middle of a side, but point V is at a corner and it meets the right triangle at the middle of the shorter leg, but point W is at the middle of the slanted side.
Practice 33 of 80 · medium
The left box shows two shapes, each with a lettered point, and a line with the same two letters on its ends. Which figure shows how the shapes connect when each end of the line is attached to the point with the same letter?
Show the answer
Answer: C
Check one letter at a time. Point G is at the center of the parallelogram, and point H is at a wide corner of the diamond. Cross out any figure where either end of the line lands somewhere else or where a shape has changed. The shapes may be turned, so find each point by its place on the shape (corner, middle of a side, center), not by up, down, left or right.
A: One of the shapes here is a rectangle, but the left box has a parallelogram. Joining parts never changes a shape.
B: The line ends in the wrong place: it meets the parallelogram at a sharp corner, but point G is at the center.
C (correct): The line joins the center of the parallelogram to a wide corner of the diamond, the same spots as points G and H in the left box; turning a shape does not move a point on it.
D: The line ends in the wrong place: it meets the diamond at a sharp corner, but point H is at a wide corner.
Practice 34 of 80 · easy
The left box shows two shapes, each with a lettered point, and a line with the same two letters on its ends. Which figure shows how the shapes connect when each end of the line is attached to the point with the same letter?
Show the answer
Answer: C
Check one letter at a time. Point K is at the middle of a side of the pentagon, and point L is at the middle of a short side of the parallelogram. Cross out any figure where either end of the line lands somewhere else or where a shape has changed. The shapes may be turned, so find each point by its place on the shape (corner, middle of a side, center), not by up, down, left or right.
A: The line ends in the wrong place: it meets the parallelogram at the center, but point L is at the middle of a short side.
B: The line ends in the wrong place: it meets the pentagon at the center, but point K is at the middle of a side.
C (correct): The line joins the middle of a side of the pentagon to the middle of a short side of the parallelogram, the same spots as points K and L in the left box; turning a shape does not move a point on it.
D: The line ends in the wrong place: it meets the pentagon at a corner, but point K is at the middle of a side and it meets the parallelogram at a sharp corner, but point L is at the middle of a short side.
Practice 35 of 80 · easy
The left box shows two shapes, each with a lettered point, and a line with the same two letters on its ends. Which figure shows how the shapes connect when each end of the line is attached to the point with the same letter?
Show the answer
Answer: D
Check one letter at a time. Point G is at a corner of the rectangle, and point H is at a corner of the flat side of the half-circle. Cross out any figure where either end of the line lands somewhere else or where a shape has changed. The shapes may be turned, so find each point by its place on the shape (corner, middle of a side, center), not by up, down, left or right.
A: The line ends in the wrong place: it meets the rectangle at the center, but point G is at a corner and it meets the half-circle at the middle of the flat side, but point H is at a corner of the flat side.
B: The line ends in the wrong place: it meets the rectangle at the middle of a long side, but point G is at a corner.
C: The line ends in the wrong place: it meets the half-circle at the top of the curved side, but point H is at a corner of the flat side.
D (correct): The line joins a corner of the rectangle to a corner of the flat side of the half-circle, the same spots as points G and H in the left box; turning a shape does not move a point on it.
Practice 36 of 80 · medium
The left box shows two shapes, each with a lettered point, and a line with the same two letters on its ends. Which figure shows how the shapes connect when each end of the line is attached to the point with the same letter?
Show the answer
Answer: A
Check one letter at a time. Point X is at the middle of the bottom side of the house shape, and point Y is at the center of the square. Cross out any figure where either end of the line lands somewhere else or where a shape has changed. The shapes may be turned, so find each point by its place on the shape (corner, middle of a side, center), not by up, down, left or right.
A (correct): The line joins the middle of the bottom side of the house shape to the center of the square, the same spots as points X and Y in the left box; turning a shape does not move a point on it.
B: One of the shapes here is a diamond, but the left box has a square. Joining parts never changes a shape.
C: The line ends in the wrong place: it meets the square at the middle of a side, but point Y is at the center.
D: The line ends in the wrong place: it meets the house shape at the middle of a wall, but point X is at the middle of the bottom side.
Practice 37 of 80 · medium
The left box shows two shapes, each with a lettered point, and a line with the same two letters on its ends. Which figure shows how the shapes connect when each end of the line is attached to the point with the same letter?
Show the answer
Answer: D
Check one letter at a time. Point K is at a corner of the short side of the trapezoid, and point L is at a wide corner of the diamond. Cross out any figure where either end of the line lands somewhere else or where a shape has changed. The shapes may be turned, so find each point by its place on the shape (corner, middle of a side, center), not by up, down, left or right.
A: The line ends in the wrong place: it meets the diamond at the center, but point L is at a wide corner.
B: The line ends in the wrong place: it meets the trapezoid at the middle of the short side, but point K is at a corner of the short side and it meets the diamond at the middle of a side, but point L is at a wide corner.
C: The line ends in the wrong place: it meets the diamond at a sharp corner, but point L is at a wide corner.
D (correct): The line joins a corner of the short side of the trapezoid to a wide corner of the diamond, the same spots as points K and L in the left box; turning a shape does not move a point on it.
Practice 38 of 80 · easy
The left box shows two shapes, each with a lettered point, and a line with the same two letters on its ends. Which figure shows how the shapes connect when each end of the line is attached to the point with the same letter?
Show the answer
Answer: C
Check one letter at a time. Point X is at a corner of the square, and point Y is at the sharpest corner of the right triangle. Cross out any figure where either end of the line lands somewhere else or where a shape has changed. The shapes may be turned, so find each point by its place on the shape (corner, middle of a side, center), not by up, down, left or right.
A: The line ends in the wrong place: it meets the square at the middle of a side, but point X is at a corner and it meets the right triangle at the middle of the longer leg, but point Y is at the sharpest corner.
B: The line ends in the wrong place: it meets the right triangle at the middle of the slanted side, but point Y is at the sharpest corner.
C (correct): The line joins a corner of the square to the sharpest corner of the right triangle, the same spots as points X and Y in the left box; turning a shape does not move a point on it.
D: The line ends in the wrong place: it meets the right triangle at the middle of the shorter leg, but point Y is at the sharpest corner.
Practice 39 of 80 · medium
The left box shows two shapes, each with a lettered point, and a line with the same two letters on its ends. Which figure shows how the shapes connect when each end of the line is attached to the point with the same letter?
Show the answer
Answer: A
Check one letter at a time. Point R is at a corner of the short side of the trapezoid, and point S is at the center of the rectangle. Cross out any figure where either end of the line lands somewhere else or where a shape has changed. The shapes may be turned, so find each point by its place on the shape (corner, middle of a side, center), not by up, down, left or right.
A (correct): The line joins a corner of the short side of the trapezoid to the center of the rectangle, the same spots as points R and S in the left box; turning a shape does not move a point on it.
B: The line ends in the wrong place: it meets the rectangle at the middle of a long side, but point S is at the center.
C: The line ends in the wrong place: it meets the rectangle at a corner, but point S is at the center.
D: One of the shapes here is a square, but the left box has a rectangle. Joining parts never changes a shape.
Practice 40 of 80 · medium
The left box shows two shapes, each with a lettered point, and a line with the same two letters on its ends. Which figure shows how the shapes connect when each end of the line is attached to the point with the same letter?
Show the answer
Answer: C
Check one letter at a time. Point P is at the middle of a slanted side of the trapezoid, and point Q is at the middle of a side of the pentagon. Cross out any figure where either end of the line lands somewhere else or where a shape has changed. The shapes may be turned, so find each point by its place on the shape (corner, middle of a side, center), not by up, down, left or right.
A: One of the shapes here is a hexagon, but the left box has a pentagon. Joining parts never changes a shape.
B: The line ends in the wrong place: it meets the trapezoid at a corner of the short side, but point P is at the middle of a slanted side.
C (correct): The line joins the middle of a slanted side of the trapezoid to the middle of a side of the pentagon, the same spots as points P and Q in the left box; turning a shape does not move a point on it.
D: The line ends in the wrong place: it meets the trapezoid at a corner of the long side, but point P is at the middle of a slanted side.
Practice 41 of 80 · hard
The left box shows separate flat pieces. Which figure shows how the pieces look when they are fitted together?
Show the answer
Answer: B
Count the pieces first: every figure must use each piece exactly once, with nothing added. Then pick one distinctive piece, such as the largest one or one with a curved or sharply pointed edge, and look for it in each figure; pieces may be turned but never flipped over. A figure whose cut lines are in different places has pieces of different sizes and can be crossed out. Here the pieces fit together into a rectangle.
A: A cut is in a different place, so the pieces do not match: one piece here covers about 32% of the shape, but the matching piece in the left box covers about 24%.
B (correct): This rectangle is made of exactly the 4 pieces in the left box, each only turned and slid into place.
C: A cut is in a different place, so the pieces do not match: one piece here covers about 45% of the shape, but the matching piece in the left box covers about 34%.
D: This figure is a parallelogram. The pieces in the left box do not have these shapes, so they cannot fill this outline without gaps or overlaps.
Practice 42 of 80 · medium
The left box shows separate flat pieces. Which figure shows how the pieces look when they are fitted together?
Show the answer
Answer: D
Count the pieces first: every figure must use each piece exactly once, with nothing added. Then pick one distinctive piece, such as the largest one or one with a curved or sharply pointed edge, and look for it in each figure; pieces may be turned but never flipped over. A figure whose cut lines are in different places has pieces of different sizes and can be crossed out. Here the pieces fit together into a half-circle.
A: This figure has 4 pieces, but the left box has 3. Every piece must be used once, and nothing may be added.
B: A cut is in a different place, so the pieces do not match: one piece here covers about 39% of the shape, but the matching piece in the left box covers about 23%.
C: This figure is a trapezoid. The pieces in the left box do not have these shapes, so they cannot fill this outline without gaps or overlaps.
D (correct): This half-circle is made of exactly the 3 pieces in the left box, each only turned and slid into place.
Practice 43 of 80 · hard
The left box shows separate flat pieces. Which figure shows how the pieces look when they are fitted together?
Show the answer
Answer: B
Count the pieces first: every figure must use each piece exactly once, with nothing added. Then pick one distinctive piece, such as the largest one or one with a curved or sharply pointed edge, and look for it in each figure; pieces may be turned but never flipped over. A figure whose cut lines are in different places has pieces of different sizes and can be crossed out. Here the pieces fit together into a square.
A: A cut is in a different place, so the pieces do not match: one piece here covers about 53% of the shape, but the matching piece in the left box covers about 34%.
B (correct): This square is made of exactly the 4 pieces in the left box, each only turned and slid into place.
C: A cut is in a different place, so the pieces do not match: one piece here covers about 24% of the shape, but the matching piece in the left box covers about 32%.
D: This figure is a diamond. The pieces in the left box do not have these shapes, so they cannot fill this outline without gaps or overlaps.
Practice 44 of 80 · medium
The left box shows separate flat pieces. Which figure shows how the pieces look when they are fitted together?
Show the answer
Answer: D
Count the pieces first: every figure must use each piece exactly once, with nothing added. Then pick one distinctive piece, such as the largest one or one with a curved or sharply pointed edge, and look for it in each figure; pieces may be turned but never flipped over. A figure whose cut lines are in different places has pieces of different sizes and can be crossed out. Here the pieces fit together into a rectangle.
A: A cut is in a different place, so the pieces do not match: one piece here covers about 26% of the shape, but the matching piece in the left box covers about 13%.
B: This figure has 4 pieces, but the left box has 3. Every piece must be used once, and nothing may be added.
C: A cut is in a different place, so the pieces do not match: one piece here covers about 33% of the shape, but the matching piece in the left box covers about 42%.
D (correct): This rectangle is made of exactly the 3 pieces in the left box, each only turned and slid into place.
Practice 45 of 80 · easy
The left box shows separate flat pieces. Which figure shows how the pieces look when they are fitted together?
Show the answer
Answer: A
Count the pieces first: every figure must use each piece exactly once, with nothing added. Then pick one distinctive piece, such as the largest one or one with a curved or sharply pointed edge, and look for it in each figure; pieces may be turned but never flipped over. A figure whose cut lines are in different places has pieces of different sizes and can be crossed out. Here the pieces fit together into a diamond.
A (correct): This diamond is made of exactly the 2 pieces in the left box, each only turned and slid into place.
B: A cut is in a different place, so the pieces do not match: one piece here covers about 39% of the shape, but the matching piece in the left box covers about 32%.
C: This figure is a square. The pieces in the left box do not have these shapes, so they cannot fill this outline without gaps or overlaps.
D: This figure has 3 pieces, but the left box has 2. Every piece must be used once, and nothing may be added.
Practice 46 of 80 · medium
The left box shows separate flat pieces. Which figure shows how the pieces look when they are fitted together?
Show the answer
Answer: C
Count the pieces first: every figure must use each piece exactly once, with nothing added. Then pick one distinctive piece, such as the largest one or one with a curved or sharply pointed edge, and look for it in each figure; pieces may be turned but never flipped over. A figure whose cut lines are in different places has pieces of different sizes and can be crossed out. Here the pieces fit together into a half-circle.
A: A cut is in a different place, so the pieces do not match: one piece here covers about 42% of the shape, but the matching piece in the left box covers about 63%.
B: A cut is in a different place, so the pieces do not match: one piece here covers about 50% of the shape, but the matching piece in the left box covers about 63%.
C (correct): This half-circle is made of exactly the 3 pieces in the left box, each only turned and slid into place.
D: This figure has 4 pieces, but the left box has 3. Every piece must be used once, and nothing may be added.
Practice 47 of 80 · easy
The left box shows separate flat pieces. Which figure shows how the pieces look when they are fitted together?
Show the answer
Answer: B
Count the pieces first: every figure must use each piece exactly once, with nothing added. Then pick one distinctive piece, such as the largest one or one with a curved or sharply pointed edge, and look for it in each figure; pieces may be turned but never flipped over. A figure whose cut lines are in different places has pieces of different sizes and can be crossed out. Here the pieces fit together into a square.
A: A cut is in a different place, so the pieces do not match: one piece here covers about 13% of the shape, but the matching piece in the left box covers about 43%.
B (correct): This square is made of exactly the 2 pieces in the left box, each only turned and slid into place.
C: This figure has 3 pieces, but the left box has 2. Every piece must be used once, and nothing may be added.
D: This figure is a rectangle. The pieces in the left box do not have these shapes, so they cannot fill this outline without gaps or overlaps.
Practice 48 of 80 · hard
The left box shows separate flat pieces. Which figure shows how the pieces look when they are fitted together?
Show the answer
Answer: A
Count the pieces first: every figure must use each piece exactly once, with nothing added. Then pick one distinctive piece, such as the largest one or one with a curved or sharply pointed edge, and look for it in each figure; pieces may be turned but never flipped over. A figure whose cut lines are in different places has pieces of different sizes and can be crossed out. Here the pieces fit together into a rectangle.
A (correct): This rectangle is made of exactly the 4 pieces in the left box, each only turned and slid into place.
B: This figure is a square. The pieces in the left box do not have these shapes, so they cannot fill this outline without gaps or overlaps.
C: A cut is in a different place, so the pieces do not match: one piece here covers about 47% of the shape, but the matching piece in the left box covers about 54%.
D: A cut is in a different place, so the pieces do not match: one piece here covers about 39% of the shape, but the matching piece in the left box covers about 54%.
Practice 49 of 80 · hard
The left box shows separate flat pieces. Which figure shows how the pieces look when they are fitted together?
Show the answer
Answer: B
Count the pieces first: every figure must use each piece exactly once, with nothing added. Then pick one distinctive piece, such as the largest one or one with a curved or sharply pointed edge, and look for it in each figure; pieces may be turned but never flipped over. A figure whose cut lines are in different places has pieces of different sizes and can be crossed out. Here the pieces fit together into a square.
A: A cut is in a different place, so the pieces do not match: one piece here covers about 13% of the shape, but the matching piece in the left box covers about 22%.
B (correct): This square is made of exactly the 4 pieces in the left box, each only turned and slid into place.
C: A cut is in a different place, so the pieces do not match: one piece here covers about 46% of the shape, but the matching piece in the left box covers about 35%.
D: This figure is a rectangle. The pieces in the left box do not have these shapes, so they cannot fill this outline without gaps or overlaps.
Practice 50 of 80 · hard
The left box shows separate flat pieces. Which figure shows how the pieces look when they are fitted together?
Show the answer
Answer: D
Count the pieces first: every figure must use each piece exactly once, with nothing added. Then pick one distinctive piece, such as the largest one or one with a curved or sharply pointed edge, and look for it in each figure; pieces may be turned but never flipped over. A figure whose cut lines are in different places has pieces of different sizes and can be crossed out. Here the pieces fit together into a rectangle.
A: A cut is in a different place, so the pieces do not match: one piece here covers about 25% of the shape, but the matching piece in the left box covers about 33%.
B: This figure is a parallelogram. The pieces in the left box do not have these shapes, so they cannot fill this outline without gaps or overlaps.
C: A cut is in a different place, so the pieces do not match: one piece here covers about 25% of the shape, but the matching piece in the left box covers about 15%.
D (correct): This rectangle is made of exactly the 4 pieces in the left box, each only turned and slid into place.
Practice 51 of 80 · medium
The left box shows separate flat pieces. Which figure shows how the pieces look when they are fitted together?
Show the answer
Answer: D
Count the pieces first: every figure must use each piece exactly once, with nothing added. Then pick one distinctive piece, such as the largest one or one with a curved or sharply pointed edge, and look for it in each figure; pieces may be turned but never flipped over. A figure whose cut lines are in different places has pieces of different sizes and can be crossed out. Here the pieces fit together into a rectangle.
A: A cut is in a different place, so the pieces do not match: one piece here covers about 41% of the shape, but the matching piece in the left box covers about 32%.
B: A cut is in a different place, so the pieces do not match: one piece here covers about 71% of the shape, but the matching piece in the left box covers about 49%.
C: This figure has 4 pieces, but the left box has 3. Every piece must be used once, and nothing may be added.
D (correct): This rectangle is made of exactly the 3 pieces in the left box, each only turned and slid into place.
Practice 52 of 80 · medium
The left box shows separate flat pieces. Which figure shows how the pieces look when they are fitted together?
Show the answer
Answer: C
Count the pieces first: every figure must use each piece exactly once, with nothing added. Then pick one distinctive piece, such as the largest one or one with a curved or sharply pointed edge, and look for it in each figure; pieces may be turned but never flipped over. A figure whose cut lines are in different places has pieces of different sizes and can be crossed out. Here the pieces fit together into a triangle.
A: A cut is in a different place, so the pieces do not match: one piece here covers about 20% of the shape, but the matching piece in the left box covers about 12%.
B: This figure has 4 pieces, but the left box has 3. Every piece must be used once, and nothing may be added.
C (correct): This triangle is made of exactly the 3 pieces in the left box, each only turned and slid into place.
D: A cut is in a different place, so the pieces do not match: one piece here covers about 27% of the shape, but the matching piece in the left box covers about 40%.
Practice 53 of 80 · medium
The left box shows separate flat pieces. Which figure shows how the pieces look when they are fitted together?
Show the answer
Answer: C
Count the pieces first: every figure must use each piece exactly once, with nothing added. Then pick one distinctive piece, such as the largest one or one with a curved or sharply pointed edge, and look for it in each figure; pieces may be turned but never flipped over. A figure whose cut lines are in different places has pieces of different sizes and can be crossed out. Here the pieces fit together into a circle.
A: This figure is a hexagon. The pieces in the left box do not have these shapes, so they cannot fill this outline without gaps or overlaps.
B: This figure has 4 pieces, but the left box has 3. Every piece must be used once, and nothing may be added.
C (correct): This circle is made of exactly the 3 pieces in the left box, each only turned and slid into place.
D: A cut is in a different place, so the pieces do not match: one piece here covers about 72% of the shape, but the matching piece in the left box covers about 40%.
Practice 54 of 80 · medium
The left box shows separate flat pieces. Which figure shows how the pieces look when they are fitted together?
Show the answer
Answer: A
Count the pieces first: every figure must use each piece exactly once, with nothing added. Then pick one distinctive piece, such as the largest one or one with a curved or sharply pointed edge, and look for it in each figure; pieces may be turned but never flipped over. A figure whose cut lines are in different places has pieces of different sizes and can be crossed out. Here the pieces fit together into a diamond.
A (correct): This diamond is made of exactly the 3 pieces in the left box, each only turned and slid into place.
B: This figure has 4 pieces, but the left box has 3. Every piece must be used once, and nothing may be added.
C: A cut is in a different place, so the pieces do not match: one piece here covers about 53% of the shape, but the matching piece in the left box covers about 43%.
D: This figure is a square. The pieces in the left box do not have these shapes, so they cannot fill this outline without gaps or overlaps.
Practice 55 of 80 · medium
The left box shows separate flat pieces. Which figure shows how the pieces look when they are fitted together?
Show the answer
Answer: B
Count the pieces first: every figure must use each piece exactly once, with nothing added. Then pick one distinctive piece, such as the largest one or one with a curved or sharply pointed edge, and look for it in each figure; pieces may be turned but never flipped over. A figure whose cut lines are in different places has pieces of different sizes and can be crossed out. Here the pieces fit together into a rectangle.
A: A cut is in a different place, so the pieces do not match: one piece here covers about 50% of the shape, but the matching piece in the left box covers about 34%.
B (correct): This rectangle is made of exactly the 3 pieces in the left box, each only turned and slid into place.
C: This figure has 4 pieces, but the left box has 3. Every piece must be used once, and nothing may be added.
D: A cut is in a different place, so the pieces do not match: one piece here covers about 23% of the shape, but the matching piece in the left box covers about 32%.
Practice 56 of 80 · medium
The left box shows separate flat pieces. Which figure shows how the pieces look when they are fitted together?
Show the answer
Answer: D
Count the pieces first: every figure must use each piece exactly once, with nothing added. Then pick one distinctive piece, such as the largest one or one with a curved or sharply pointed edge, and look for it in each figure; pieces may be turned but never flipped over. A figure whose cut lines are in different places has pieces of different sizes and can be crossed out. Here the pieces fit together into a triangle.
A: This figure has 4 pieces, but the left box has 3. Every piece must be used once, and nothing may be added.
B: A cut is in a different place, so the pieces do not match: one piece here covers about 49% of the shape, but the matching piece in the left box covers about 37%.
C: A cut is in a different place, so the pieces do not match: one piece here covers about 59% of the shape, but the matching piece in the left box covers about 37%.
D (correct): This triangle is made of exactly the 3 pieces in the left box, each only turned and slid into place.
Practice 57 of 80 · medium
The left box shows separate flat pieces. Which figure shows how the pieces look when they are fitted together?
Show the answer
Answer: A
Count the pieces first: every figure must use each piece exactly once, with nothing added. Then pick one distinctive piece, such as the largest one or one with a curved or sharply pointed edge, and look for it in each figure; pieces may be turned but never flipped over. A figure whose cut lines are in different places has pieces of different sizes and can be crossed out. Here the pieces fit together into a rectangle.
A (correct): This rectangle is made of exactly the 3 pieces in the left box, each only turned and slid into place.
B: This figure is a square. The pieces in the left box do not have these shapes, so they cannot fill this outline without gaps or overlaps.
C: This figure has 4 pieces, but the left box has 3. Every piece must be used once, and nothing may be added.
D: A cut is in a different place, so the pieces do not match: one piece here covers about 43% of the shape, but the matching piece in the left box covers about 60%.
Practice 58 of 80 · medium
The left box shows separate flat pieces. Which figure shows how the pieces look when they are fitted together?
Show the answer
Answer: D
Count the pieces first: every figure must use each piece exactly once, with nothing added. Then pick one distinctive piece, such as the largest one or one with a curved or sharply pointed edge, and look for it in each figure; pieces may be turned but never flipped over. A figure whose cut lines are in different places has pieces of different sizes and can be crossed out. Here the pieces fit together into a triangle.
A: This figure is a right triangle. The pieces in the left box do not have these shapes, so they cannot fill this outline without gaps or overlaps.
B: This figure has 4 pieces, but the left box has 3. Every piece must be used once, and nothing may be added.
C: A cut is in a different place, so the pieces do not match: one piece here covers about 52% of the shape, but the matching piece in the left box covers about 39%.
D (correct): This triangle is made of exactly the 3 pieces in the left box, each only turned and slid into place.
Practice 59 of 80 · hard
The left box shows separate flat pieces. Which figure shows how the pieces look when they are fitted together?
Show the answer
Answer: B
Count the pieces first: every figure must use each piece exactly once, with nothing added. Then pick one distinctive piece, such as the largest one or one with a curved or sharply pointed edge, and look for it in each figure; pieces may be turned but never flipped over. A figure whose cut lines are in different places has pieces of different sizes and can be crossed out. Here the pieces fit together into a trapezoid.
A: This figure is a half-circle. The pieces in the left box do not have these shapes, so they cannot fill this outline without gaps or overlaps.
B (correct): This trapezoid is made of exactly the 4 pieces in the left box, each only turned and slid into place.
C: A cut is in a different place, so the pieces do not match: one piece here covers about 33% of the shape, but the matching piece in the left box covers about 24%.
D: A cut is in a different place, so the pieces do not match: one piece here covers about 29% of the shape, but the matching piece in the left box covers about 37%.
Practice 60 of 80 · medium
The left box shows separate flat pieces. Which figure shows how the pieces look when they are fitted together?
Show the answer
Answer: A
Count the pieces first: every figure must use each piece exactly once, with nothing added. Then pick one distinctive piece, such as the largest one or one with a curved or sharply pointed edge, and look for it in each figure; pieces may be turned but never flipped over. A figure whose cut lines are in different places has pieces of different sizes and can be crossed out. Here the pieces fit together into a triangle.
A (correct): This triangle is made of exactly the 3 pieces in the left box, each only turned and slid into place.
B: A cut is in a different place, so the pieces do not match: one piece here covers about 62% of the shape, but the matching piece in the left box covers about 36%.
C: A cut is in a different place, so the pieces do not match: one piece here covers about 23% of the shape, but the matching piece in the left box covers about 31%.
D: This figure has 4 pieces, but the left box has 3. Every piece must be used once, and nothing may be added.
Practice 61 of 80 · easy
The left box shows separate flat pieces. Which figure shows how the pieces look when they are fitted together?
Show the answer
Answer: D
Count the pieces first: every figure must use each piece exactly once, with nothing added. Then pick one distinctive piece, such as the largest one or one with a curved or sharply pointed edge, and look for it in each figure; pieces may be turned but never flipped over. A figure whose cut lines are in different places has pieces of different sizes and can be crossed out. Here the pieces fit together into a parallelogram.
A: This figure is a rectangle. The pieces in the left box do not have these shapes, so they cannot fill this outline without gaps or overlaps.
B: A cut is in a different place, so the pieces do not match: one piece here covers about 30% of the shape, but the matching piece in the left box covers about 19%.
C: This figure has 3 pieces, but the left box has 2. Every piece must be used once, and nothing may be added.
D (correct): This parallelogram is made of exactly the 2 pieces in the left box, each only turned and slid into place.
Practice 62 of 80 · easy
The left box shows separate flat pieces. Which figure shows how the pieces look when they are fitted together?
Show the answer
Answer: B
Count the pieces first: every figure must use each piece exactly once, with nothing added. Then pick one distinctive piece, such as the largest one or one with a curved or sharply pointed edge, and look for it in each figure; pieces may be turned but never flipped over. A figure whose cut lines are in different places has pieces of different sizes and can be crossed out. Here the pieces fit together into a hexagon.
A: A cut is in a different place, so the pieces do not match: one piece here covers about 44% of the shape, but the matching piece in the left box covers about 18%.
B (correct): This hexagon is made of exactly the 2 pieces in the left box, each only turned and slid into place.
C: This figure has 3 pieces, but the left box has 2. Every piece must be used once, and nothing may be added.
D: This figure is a pentagon. The pieces in the left box do not have these shapes, so they cannot fill this outline without gaps or overlaps.
Practice 63 of 80 · hard
The left box shows separate flat pieces. Which figure shows how the pieces look when they are fitted together?
Show the answer
Answer: B
Count the pieces first: every figure must use each piece exactly once, with nothing added. Then pick one distinctive piece, such as the largest one or one with a curved or sharply pointed edge, and look for it in each figure; pieces may be turned but never flipped over. A figure whose cut lines are in different places has pieces of different sizes and can be crossed out. Here the pieces fit together into a rectangle.
A: A cut is in a different place, so the pieces do not match: one piece here covers about 31% of the shape, but the matching piece in the left box covers about 21%.
B (correct): This rectangle is made of exactly the 4 pieces in the left box, each only turned and slid into place.
C: This figure is a parallelogram. The pieces in the left box do not have these shapes, so they cannot fill this outline without gaps or overlaps.
D: A cut is in a different place, so the pieces do not match: one piece here covers about 52% of the shape, but the matching piece in the left box covers about 45%.
Practice 64 of 80 · easy
The left box shows separate flat pieces. Which figure shows how the pieces look when they are fitted together?
Show the answer
Answer: C
Count the pieces first: every figure must use each piece exactly once, with nothing added. Then pick one distinctive piece, such as the largest one or one with a curved or sharply pointed edge, and look for it in each figure; pieces may be turned but never flipped over. A figure whose cut lines are in different places has pieces of different sizes and can be crossed out. Here the pieces fit together into a triangle.
A: A cut is in a different place, so the pieces do not match: one piece here covers about 84% of the shape, but the matching piece in the left box covers about 65%.
B: A cut is in a different place, so the pieces do not match: one piece here covers about 44% of the shape, but the matching piece in the left box covers about 35%.
C (correct): This triangle is made of exactly the 2 pieces in the left box, each only turned and slid into place.
D: This figure has 3 pieces, but the left box has 2. Every piece must be used once, and nothing may be added.
Practice 65 of 80 · medium
The left box shows separate flat pieces. Which figure shows how the pieces look when they are fitted together?
Show the answer
Answer: B
Count the pieces first: every figure must use each piece exactly once, with nothing added. Then pick one distinctive piece, such as the largest one or one with a curved or sharply pointed edge, and look for it in each figure; pieces may be turned but never flipped over. A figure whose cut lines are in different places has pieces of different sizes and can be crossed out. Here the pieces fit together into a rectangle.
A: This figure is a parallelogram. The pieces in the left box do not have these shapes, so they cannot fill this outline without gaps or overlaps.
B (correct): This rectangle is made of exactly the 3 pieces in the left box, each only turned and slid into place.
C: This figure has 4 pieces, but the left box has 3. Every piece must be used once, and nothing may be added.
D: A cut is in a different place, so the pieces do not match: one piece here covers about 23% of the shape, but the matching piece in the left box covers about 30%.
Practice 66 of 80 · medium
The left box shows separate flat pieces. Which figure shows how the pieces look when they are fitted together?
Show the answer
Answer: D
Count the pieces first: every figure must use each piece exactly once, with nothing added. Then pick one distinctive piece, such as the largest one or one with a curved or sharply pointed edge, and look for it in each figure; pieces may be turned but never flipped over. A figure whose cut lines are in different places has pieces of different sizes and can be crossed out. Here the pieces fit together into a hexagon.
A: This figure has 4 pieces, but the left box has 3. Every piece must be used once, and nothing may be added.
B: A cut is in a different place, so the pieces do not match: one piece here covers about 65% of the shape, but the matching piece in the left box covers about 53%.
C: This figure is a pentagon. The pieces in the left box do not have these shapes, so they cannot fill this outline without gaps or overlaps.
D (correct): This hexagon is made of exactly the 3 pieces in the left box, each only turned and slid into place.
Practice 67 of 80 · easy
The left box shows separate flat pieces. Which figure shows how the pieces look when they are fitted together?
Show the answer
Answer: C
Count the pieces first: every figure must use each piece exactly once, with nothing added. Then pick one distinctive piece, such as the largest one or one with a curved or sharply pointed edge, and look for it in each figure; pieces may be turned but never flipped over. A figure whose cut lines are in different places has pieces of different sizes and can be crossed out. Here the pieces fit together into a triangle.
A: A cut is in a different place, so the pieces do not match: one piece here covers about 26% of the shape, but the matching piece in the left box covers about 49%.
B: This figure has 3 pieces, but the left box has 2. Every piece must be used once, and nothing may be added.
C (correct): This triangle is made of exactly the 2 pieces in the left box, each only turned and slid into place.
D: A cut is in a different place, so the pieces do not match: one piece here covers about 37% of the shape, but the matching piece in the left box covers about 49%.
Practice 68 of 80 · easy
The left box shows separate flat pieces. Which figure shows how the pieces look when they are fitted together?
Show the answer
Answer: C
Count the pieces first: every figure must use each piece exactly once, with nothing added. Then pick one distinctive piece, such as the largest one or one with a curved or sharply pointed edge, and look for it in each figure; pieces may be turned but never flipped over. A figure whose cut lines are in different places has pieces of different sizes and can be crossed out. Here the pieces fit together into a right triangle.
A: This figure is a triangle. The pieces in the left box do not have these shapes, so they cannot fill this outline without gaps or overlaps.
B: A cut is in a different place, so the pieces do not match: one piece here covers about 31% of the shape, but the matching piece in the left box covers about 18%.
C (correct): This right triangle is made of exactly the 2 pieces in the left box, each only turned and slid into place.
D: This figure has 3 pieces, but the left box has 2. Every piece must be used once, and nothing may be added.
Practice 69 of 80 · medium
The left box shows separate flat pieces. Which figure shows how the pieces look when they are fitted together?
Show the answer
Answer: B
Count the pieces first: every figure must use each piece exactly once, with nothing added. Then pick one distinctive piece, such as the largest one or one with a curved or sharply pointed edge, and look for it in each figure; pieces may be turned but never flipped over. A figure whose cut lines are in different places has pieces of different sizes and can be crossed out. Here the pieces fit together into a circle.
A: This figure has 4 pieces, but the left box has 3. Every piece must be used once, and nothing may be added.
B (correct): This circle is made of exactly the 3 pieces in the left box, each only turned and slid into place.
C: A cut is in a different place, so the pieces do not match: one piece here covers about 21% of the shape, but the matching piece in the left box covers about 31%.
D: A cut is in a different place, so the pieces do not match: one piece here covers about 47% of the shape, but the matching piece in the left box covers about 56%.
Practice 70 of 80 · medium
The left box shows separate flat pieces. Which figure shows how the pieces look when they are fitted together?
Show the answer
Answer: D
Count the pieces first: every figure must use each piece exactly once, with nothing added. Then pick one distinctive piece, such as the largest one or one with a curved or sharply pointed edge, and look for it in each figure; pieces may be turned but never flipped over. A figure whose cut lines are in different places has pieces of different sizes and can be crossed out. Here the pieces fit together into a rectangle.
A: This figure has 4 pieces, but the left box has 3. Every piece must be used once, and nothing may be added.
B: This figure is a square. The pieces in the left box do not have these shapes, so they cannot fill this outline without gaps or overlaps.
C: A cut is in a different place, so the pieces do not match: one piece here covers about 39% of the shape, but the matching piece in the left box covers about 32%.
D (correct): This rectangle is made of exactly the 3 pieces in the left box, each only turned and slid into place.
Practice 71 of 80 · medium
The left box shows separate flat pieces. Which figure shows how the pieces look when they are fitted together?
Show the answer
Answer: D
Count the pieces first: every figure must use each piece exactly once, with nothing added. Then pick one distinctive piece, such as the largest one or one with a curved or sharply pointed edge, and look for it in each figure; pieces may be turned but never flipped over. A figure whose cut lines are in different places has pieces of different sizes and can be crossed out. Here the pieces fit together into a parallelogram.
A: A cut is in a different place, so the pieces do not match: one piece here covers about 33% of the shape, but the matching piece in the left box covers about 26%.
B: This figure has 4 pieces, but the left box has 3. Every piece must be used once, and nothing may be added.
C: This figure is a rectangle. The pieces in the left box do not have these shapes, so they cannot fill this outline without gaps or overlaps.
D (correct): This parallelogram is made of exactly the 3 pieces in the left box, each only turned and slid into place.
Practice 72 of 80 · medium
The left box shows separate flat pieces. Which figure shows how the pieces look when they are fitted together?
Show the answer
Answer: A
Count the pieces first: every figure must use each piece exactly once, with nothing added. Then pick one distinctive piece, such as the largest one or one with a curved or sharply pointed edge, and look for it in each figure; pieces may be turned but never flipped over. A figure whose cut lines are in different places has pieces of different sizes and can be crossed out. Here the pieces fit together into a triangle.
A (correct): This triangle is made of exactly the 3 pieces in the left box, each only turned and slid into place.
B: This figure is a right triangle. The pieces in the left box do not have these shapes, so they cannot fill this outline without gaps or overlaps.
C: A cut is in a different place, so the pieces do not match: one piece here covers about 40% of the shape, but the matching piece in the left box covers about 49%.
D: This figure has 4 pieces, but the left box has 3. Every piece must be used once, and nothing may be added.
Practice 73 of 80 · easy
The left box shows separate flat pieces. Which figure shows how the pieces look when they are fitted together?
Show the answer
Answer: D
Count the pieces first: every figure must use each piece exactly once, with nothing added. Then pick one distinctive piece, such as the largest one or one with a curved or sharply pointed edge, and look for it in each figure; pieces may be turned but never flipped over. A figure whose cut lines are in different places has pieces of different sizes and can be crossed out. Here the pieces fit together into a pentagon.
A: This figure is a hexagon. The pieces in the left box do not have these shapes, so they cannot fill this outline without gaps or overlaps.
B: This figure has 4 pieces, but the left box has 3. Every piece must be used once, and nothing may be added.
C: A cut is in a different place, so the pieces do not match: one piece here covers about 14% of the shape, but the matching piece in the left box covers about 22%.
D (correct): This pentagon is made of exactly the 3 pieces in the left box, each only turned and slid into place.
Practice 74 of 80 · medium
The left box shows separate flat pieces. Which figure shows how the pieces look when they are fitted together?
Show the answer
Answer: C
Count the pieces first: every figure must use each piece exactly once, with nothing added. Then pick one distinctive piece, such as the largest one or one with a curved or sharply pointed edge, and look for it in each figure; pieces may be turned but never flipped over. A figure whose cut lines are in different places has pieces of different sizes and can be crossed out. Here the pieces fit together into a diamond.
A: A cut is in a different place, so the pieces do not match: one piece here covers about 49% of the shape, but the matching piece in the left box covers about 60%.
B: This figure has 4 pieces, but the left box has 3. Every piece must be used once, and nothing may be added.
C (correct): This diamond is made of exactly the 3 pieces in the left box, each only turned and slid into place.
D: This figure is a square. The pieces in the left box do not have these shapes, so they cannot fill this outline without gaps or overlaps.
Practice 75 of 80 · easy
The left box shows separate flat pieces. Which figure shows how the pieces look when they are fitted together?
Show the answer
Answer: C
Count the pieces first: every figure must use each piece exactly once, with nothing added. Then pick one distinctive piece, such as the largest one or one with a curved or sharply pointed edge, and look for it in each figure; pieces may be turned but never flipped over. A figure whose cut lines are in different places has pieces of different sizes and can be crossed out. Here the pieces fit together into a trapezoid.
A: This figure has 3 pieces, but the left box has 2. Every piece must be used once, and nothing may be added.
B: A cut is in a different place, so the pieces do not match: one piece here covers about 52% of the shape, but the matching piece in the left box covers about 74%.
C (correct): This trapezoid is made of exactly the 2 pieces in the left box, each only turned and slid into place.
D: A cut is in a different place, so the pieces do not match: one piece here covers about 17% of the shape, but the matching piece in the left box covers about 26%.
Practice 76 of 80 · hard
The left box shows separate flat pieces. Which figure shows how the pieces look when they are fitted together?
Show the answer
Answer: A
Count the pieces first: every figure must use each piece exactly once, with nothing added. Then pick one distinctive piece, such as the largest one or one with a curved or sharply pointed edge, and look for it in each figure; pieces may be turned but never flipped over. A figure whose cut lines are in different places has pieces of different sizes and can be crossed out. Here the pieces fit together into a square.
A (correct): This square is made of exactly the 4 pieces in the left box, each only turned and slid into place.
B: A cut is in a different place, so the pieces do not match: one piece here covers about 31% of the shape, but the matching piece in the left box covers about 47%.
C: A cut is in a different place, so the pieces do not match: one piece here covers about 39% of the shape, but the matching piece in the left box covers about 47%.
D: This figure is a diamond. The pieces in the left box do not have these shapes, so they cannot fill this outline without gaps or overlaps.
Practice 77 of 80 · hard
The left box shows separate flat pieces. Which figure shows how the pieces look when they are fitted together?
Show the answer
Answer: B
Count the pieces first: every figure must use each piece exactly once, with nothing added. Then pick one distinctive piece, such as the largest one or one with a curved or sharply pointed edge, and look for it in each figure; pieces may be turned but never flipped over. A figure whose cut lines are in different places has pieces of different sizes and can be crossed out. Here the pieces fit together into a rectangle.
A: A cut is in a different place, so the pieces do not match: one piece here covers about 46% of the shape, but the matching piece in the left box covers about 36%.
B (correct): This rectangle is made of exactly the 4 pieces in the left box, each only turned and slid into place.
C: This figure is a square. The pieces in the left box do not have these shapes, so they cannot fill this outline without gaps or overlaps.
D: A cut is in a different place, so the pieces do not match: one piece here covers about 13% of the shape, but the matching piece in the left box covers about 20%.
Practice 78 of 80 · hard
The left box shows separate flat pieces. Which figure shows how the pieces look when they are fitted together?
Show the answer
Answer: B
Count the pieces first: every figure must use each piece exactly once, with nothing added. Then pick one distinctive piece, such as the largest one or one with a curved or sharply pointed edge, and look for it in each figure; pieces may be turned but never flipped over. A figure whose cut lines are in different places has pieces of different sizes and can be crossed out. Here the pieces fit together into a parallelogram.
A: This figure is a rectangle. The pieces in the left box do not have these shapes, so they cannot fill this outline without gaps or overlaps.
B (correct): This parallelogram is made of exactly the 4 pieces in the left box, each only turned and slid into place.
C: A cut is in a different place, so the pieces do not match: one piece here covers about 33% of the shape, but the matching piece in the left box covers about 42%.
D: A cut is in a different place, so the pieces do not match: one piece here covers about 34% of the shape, but the matching piece in the left box covers about 26%.
Practice 79 of 80 · medium
The left box shows separate flat pieces. Which figure shows how the pieces look when they are fitted together?
Show the answer
Answer: A
Count the pieces first: every figure must use each piece exactly once, with nothing added. Then pick one distinctive piece, such as the largest one or one with a curved or sharply pointed edge, and look for it in each figure; pieces may be turned but never flipped over. A figure whose cut lines are in different places has pieces of different sizes and can be crossed out. Here the pieces fit together into a hexagon.
A (correct): This hexagon is made of exactly the 3 pieces in the left box, each only turned and slid into place.
B: A cut is in a different place, so the pieces do not match: one piece here covers about 70% of the shape, but the matching piece in the left box covers about 36%.
C: This figure has 4 pieces, but the left box has 3. Every piece must be used once, and nothing may be added.
D: This figure is a pentagon. The pieces in the left box do not have these shapes, so they cannot fill this outline without gaps or overlaps.
Practice 80 of 80 · easy
The left box shows separate flat pieces. Which figure shows how the pieces look when they are fitted together?
Show the answer
Answer: A
Count the pieces first: every figure must use each piece exactly once, with nothing added. Then pick one distinctive piece, such as the largest one or one with a curved or sharply pointed edge, and look for it in each figure; pieces may be turned but never flipped over. A figure whose cut lines are in different places has pieces of different sizes and can be crossed out. Here the pieces fit together into a triangle.
A (correct): This triangle is made of exactly the 2 pieces in the left box, each only turned and slid into place.
B: A cut is in a different place, so the pieces do not match: one piece here covers about 47% of the shape, but the matching piece in the left box covers about 25%.
C: This figure is a right triangle. The pieces in the left box do not have these shapes, so they cannot fill this outline without gaps or overlaps.
D: This figure has 3 pieces, but the left box has 2. Every piece must be used once, and nothing may be added.
About this test
Each answer is explained, including which feature would have ruled out each distractor quickest. Comparing that with your own approach is a good way to spot wasted steps and habits that slow you down.
Afterward, label each miss. Choosing by color or overlooking a small spur suggests returning to the pitfalls sections; mixing up 90 degrees clockwise and counterclockwise means reviewing the direction material; and slow but correct answers are a cue to practice the two-feature stopping rule. Rework those sections of the lesson, then attempt the test again.
The same 124 lessons, 6,516 questions and 82 timed practice tests on your phone, plus flashcards with spaced review and progress tracking. Free to download, and it works offline.
 ASVAB Camp
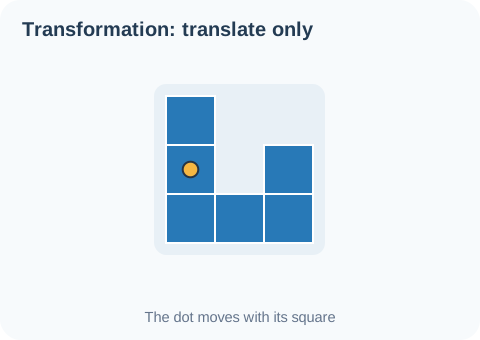
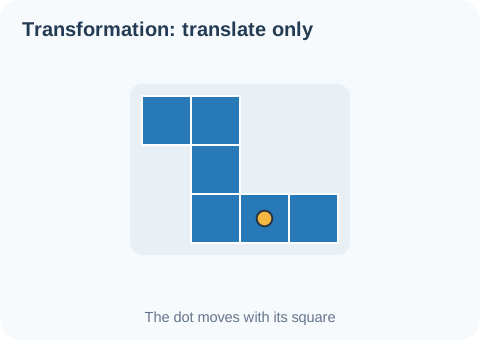
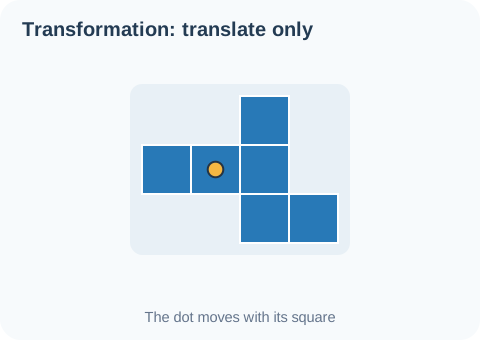
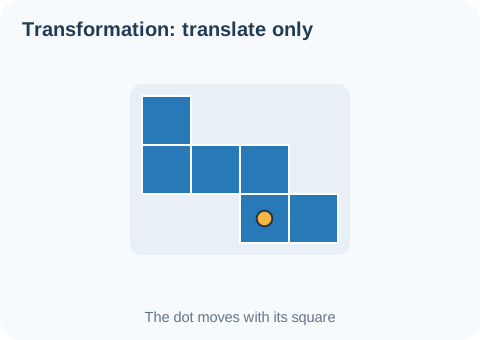
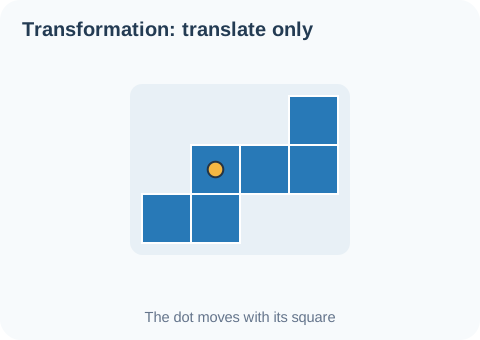
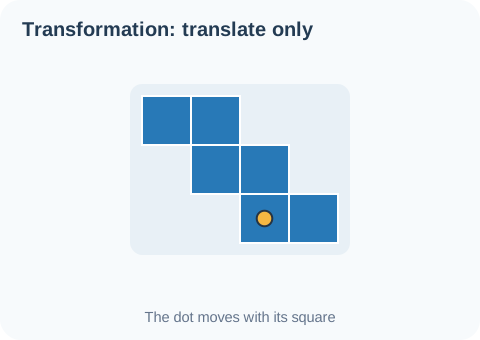
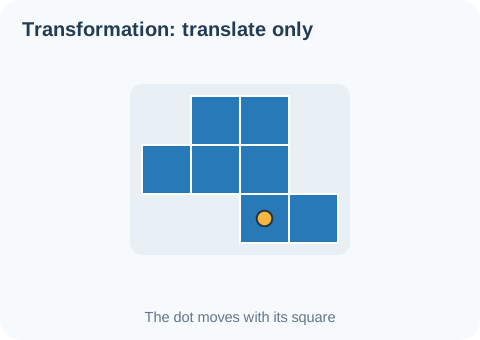
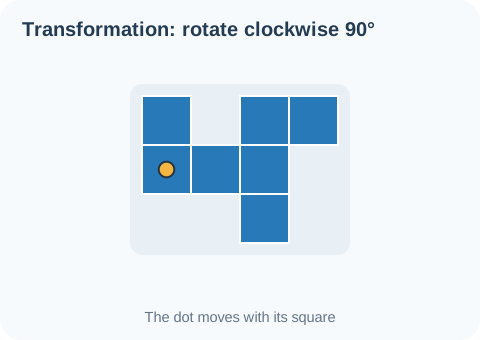
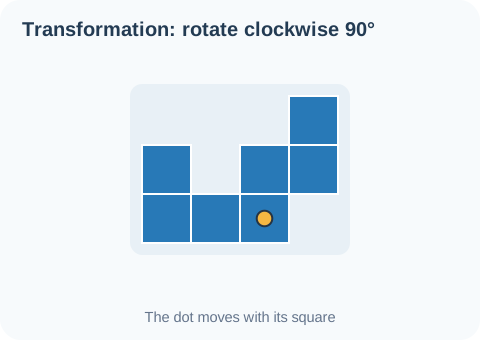
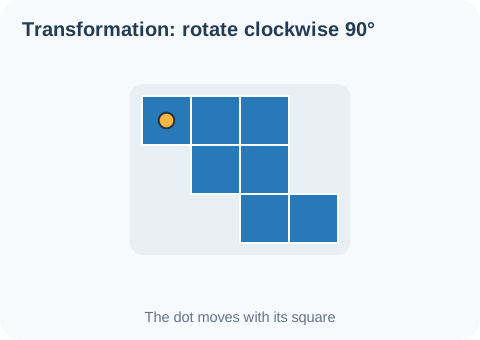
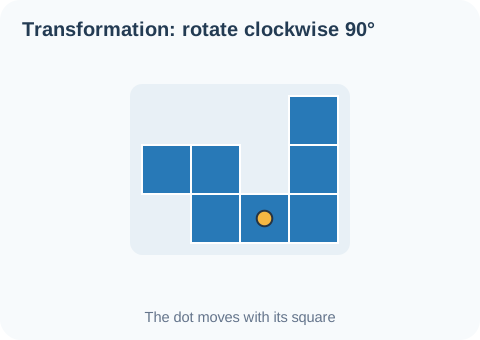
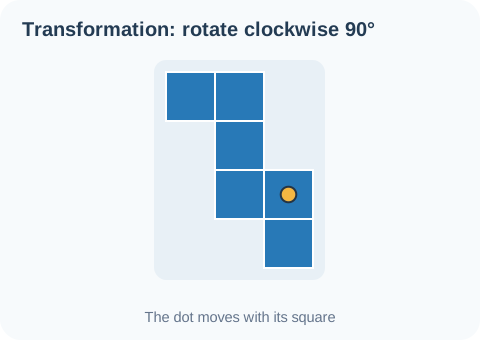
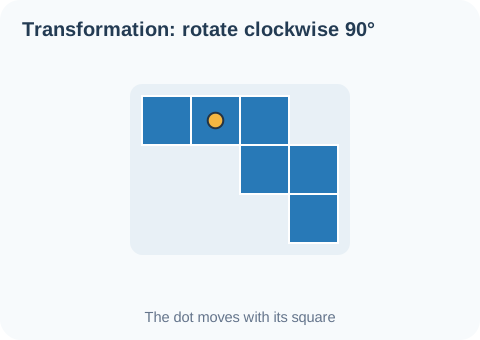
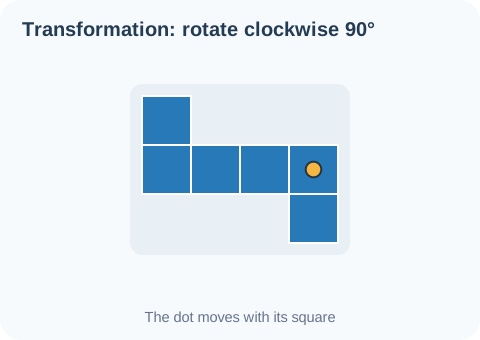
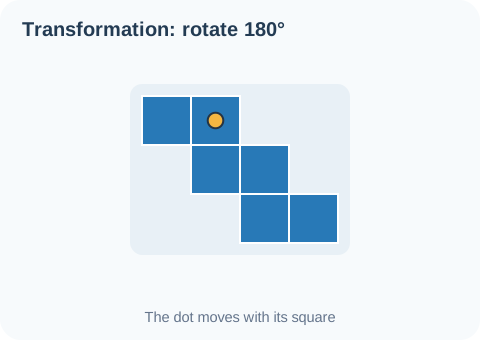
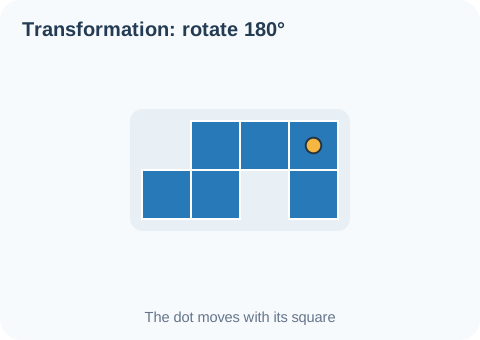
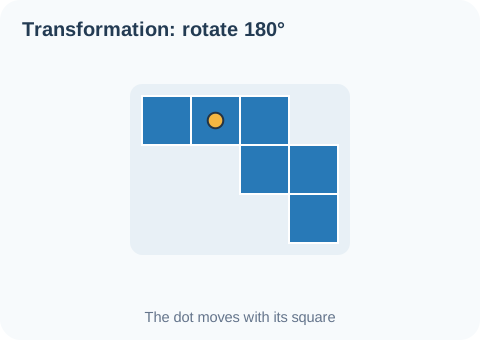
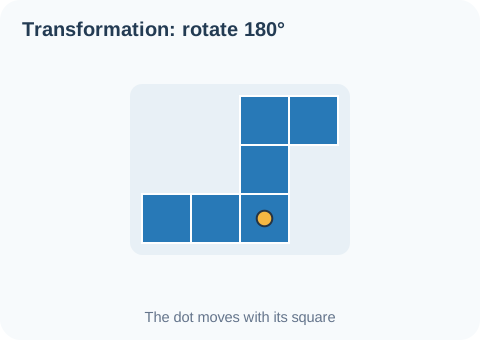
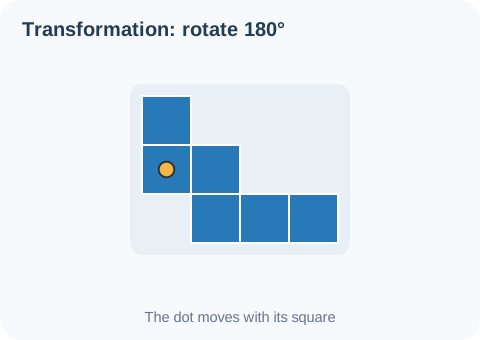
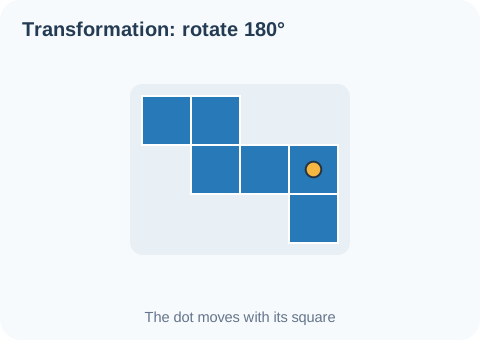
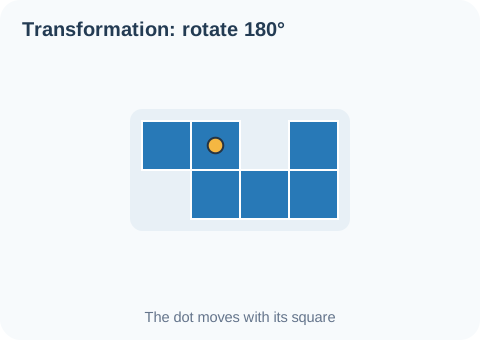
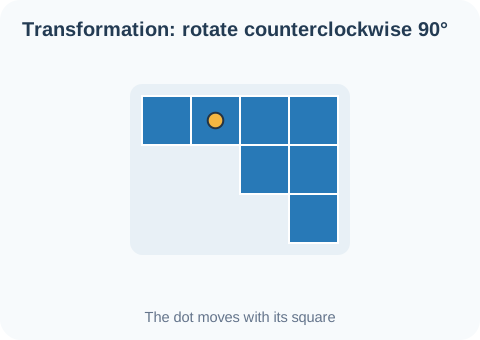
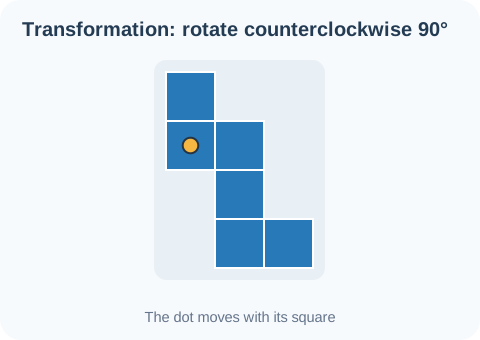
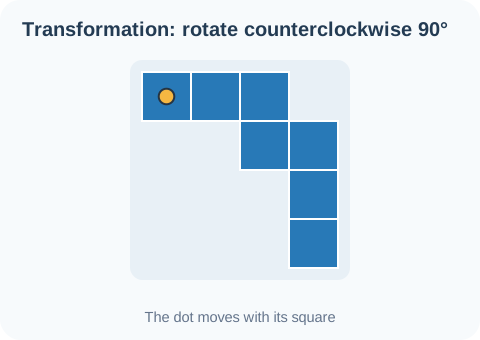
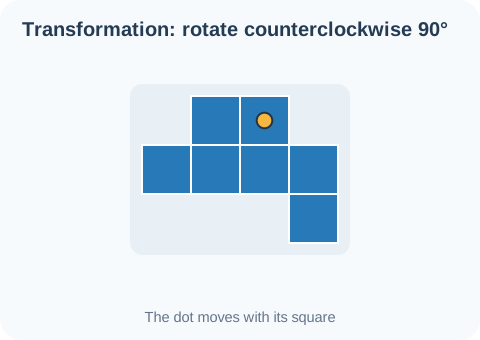
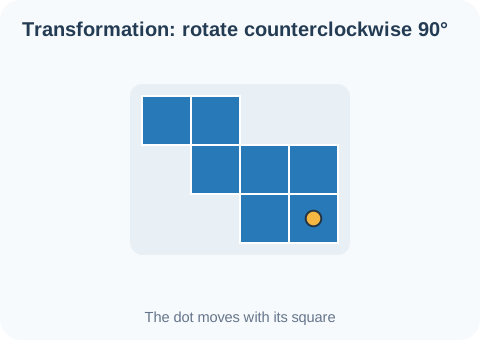
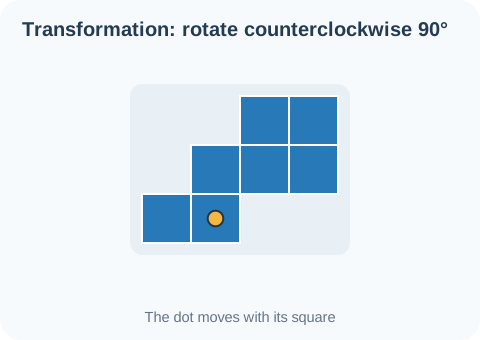
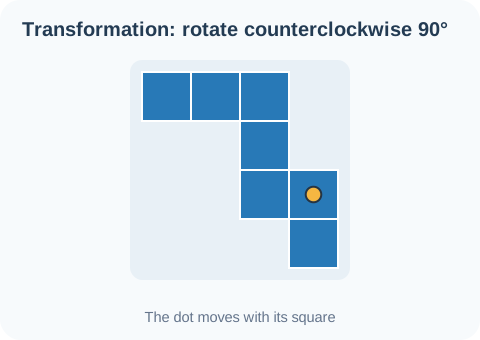
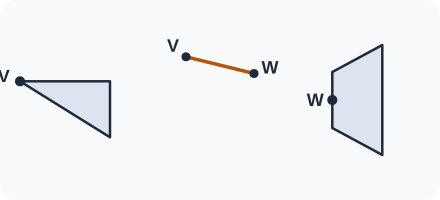
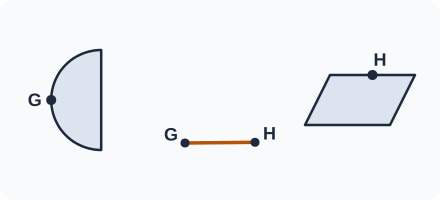
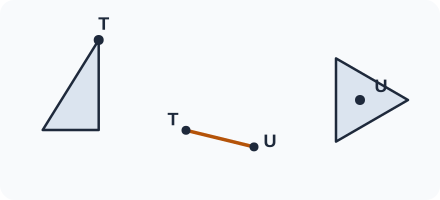
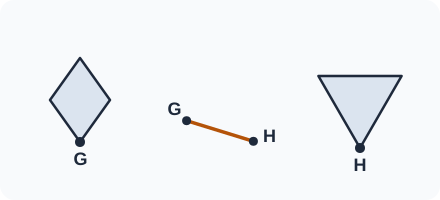
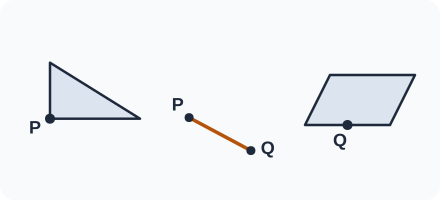
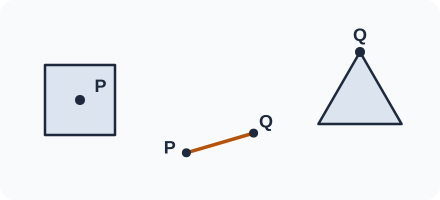
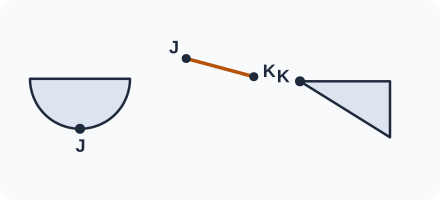
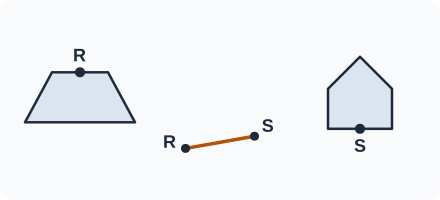
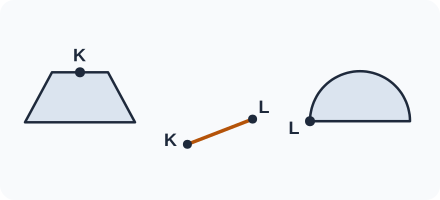
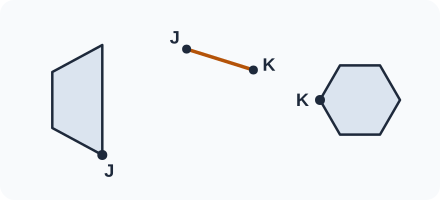
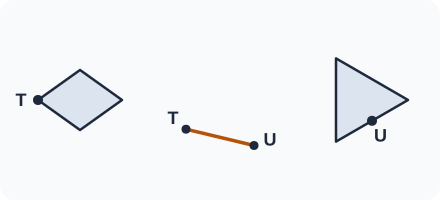
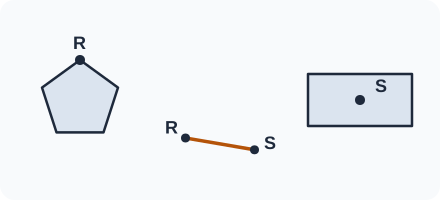
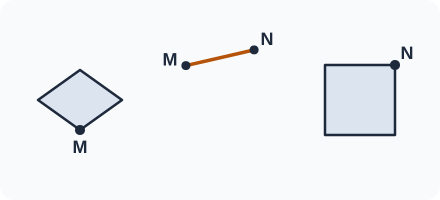
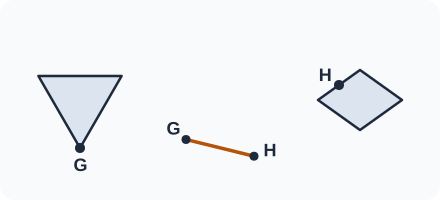
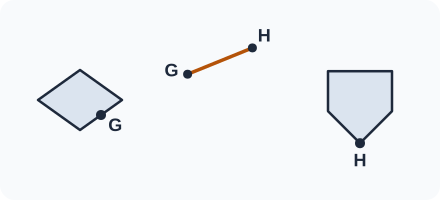
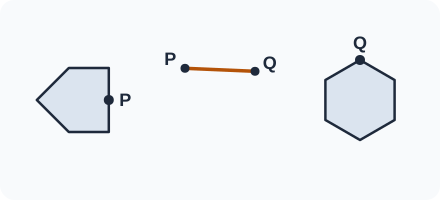
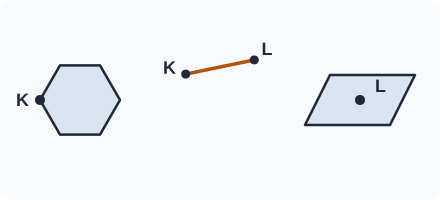
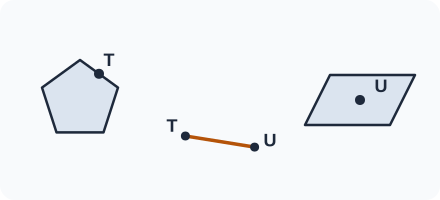
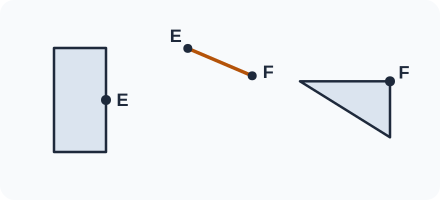
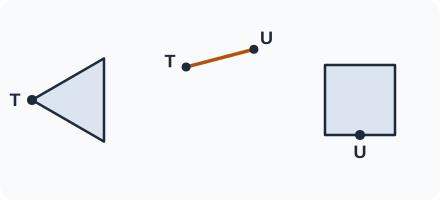
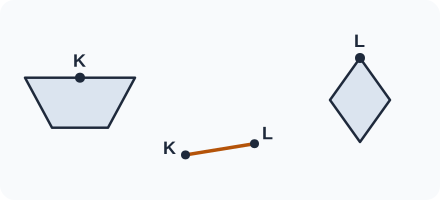
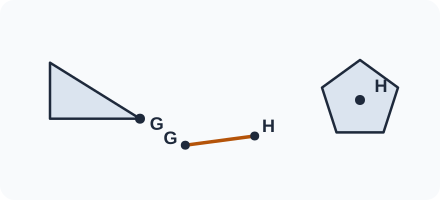
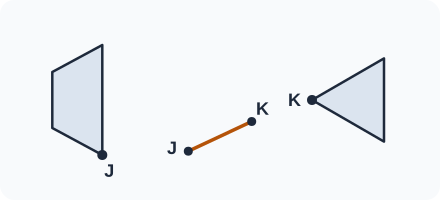
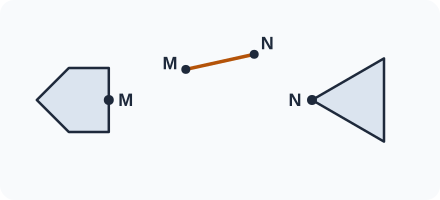
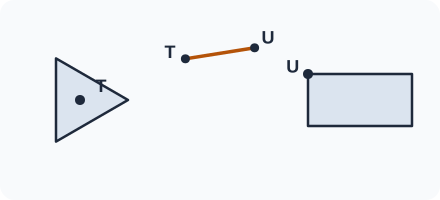
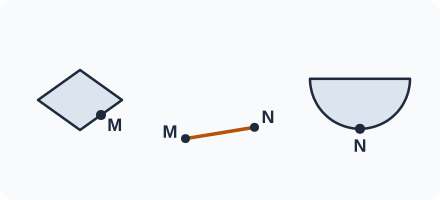
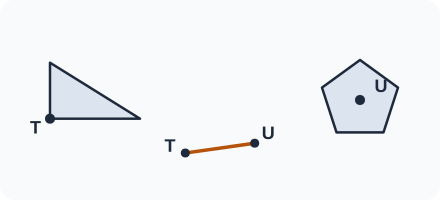
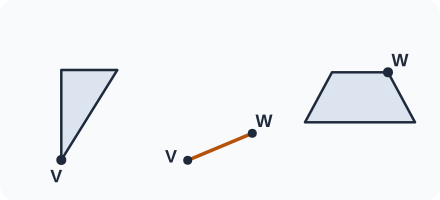
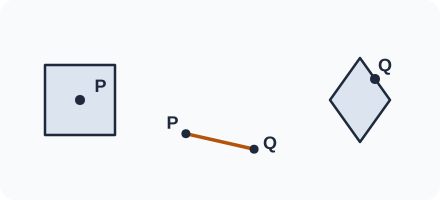
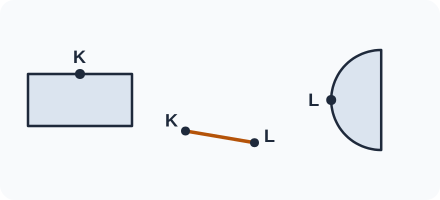
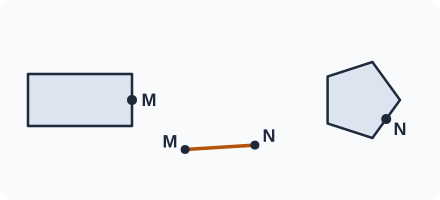
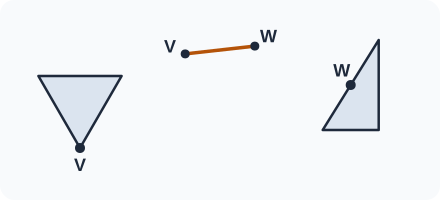
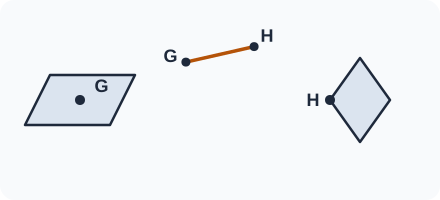
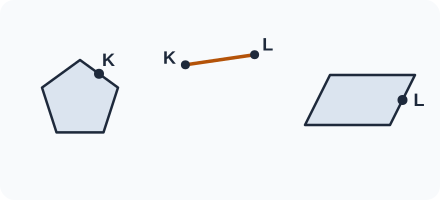
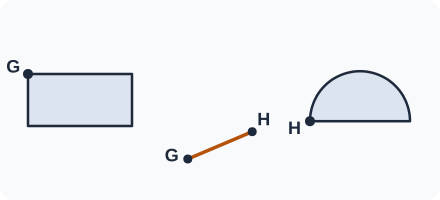
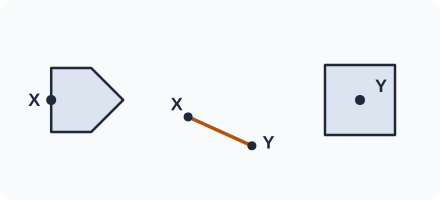
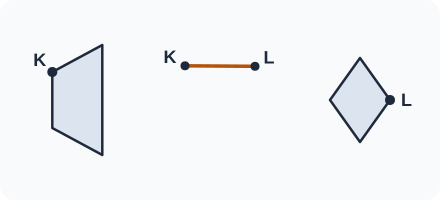
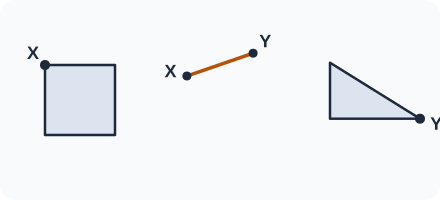
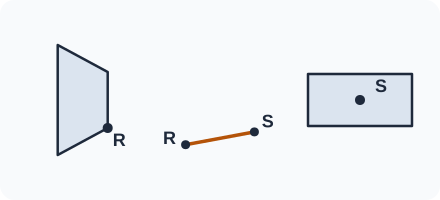
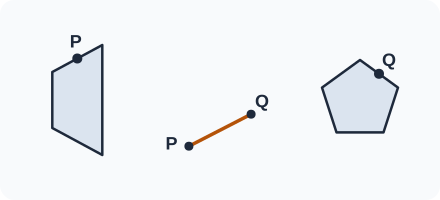
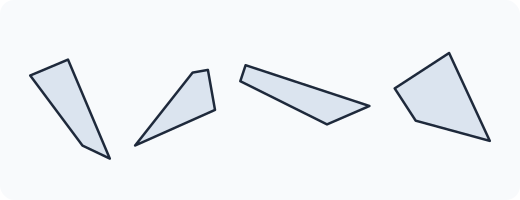
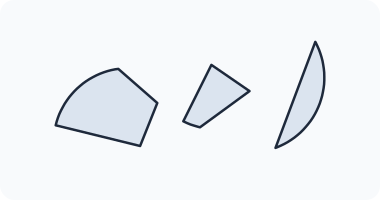
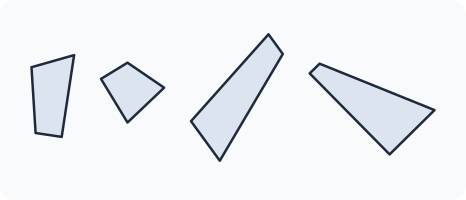
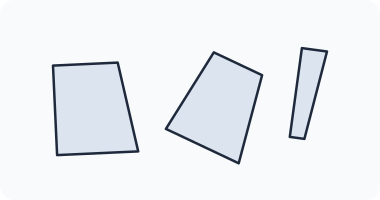
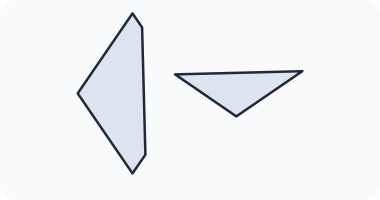
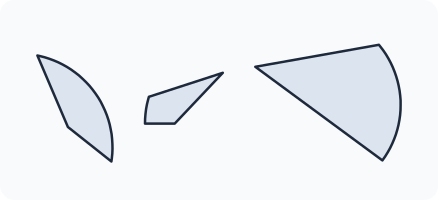
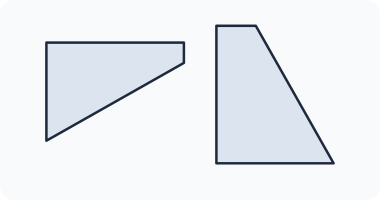
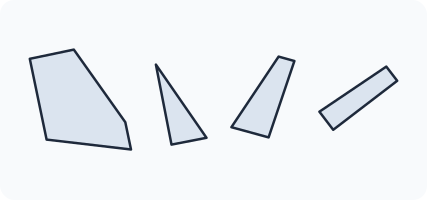
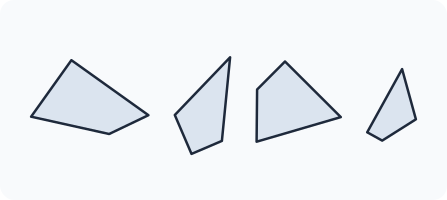
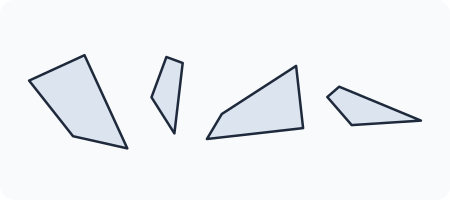
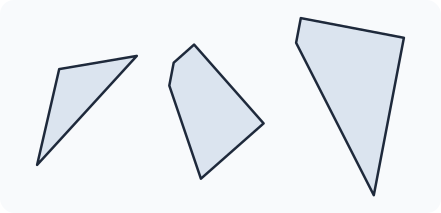
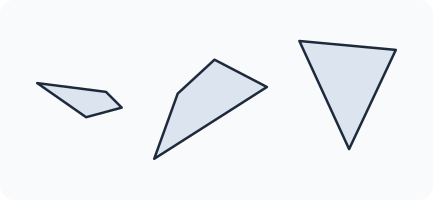
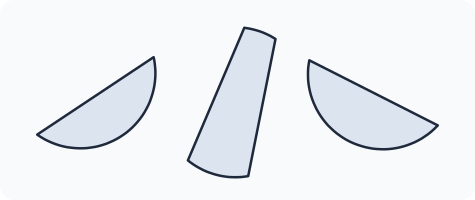
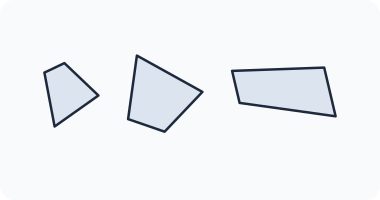
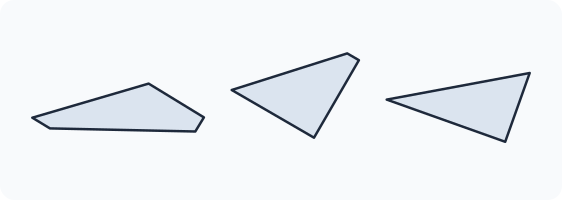
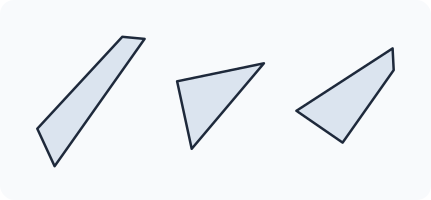
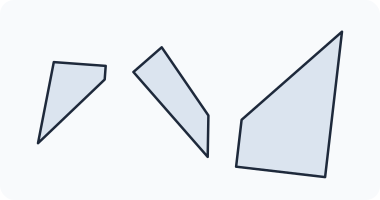
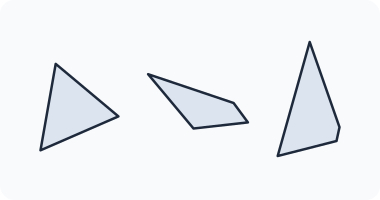
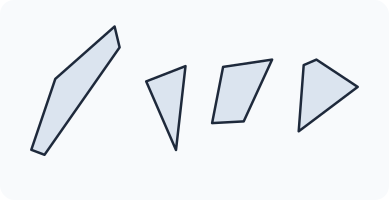
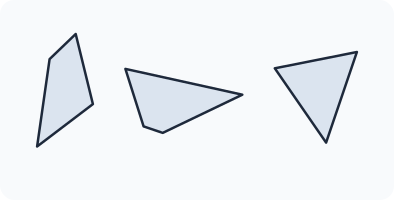
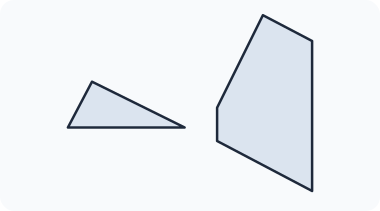
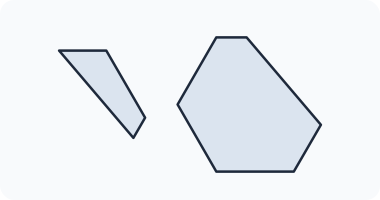
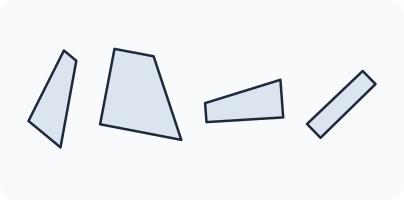
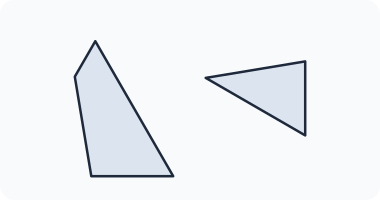
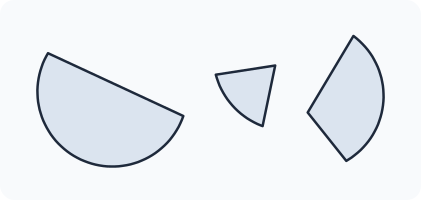
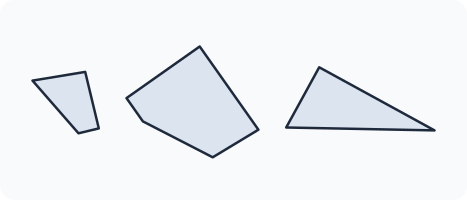
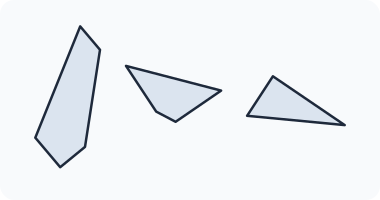
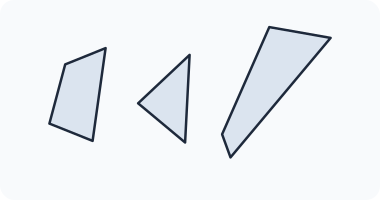
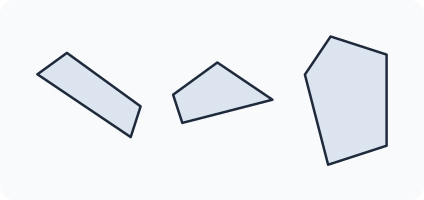
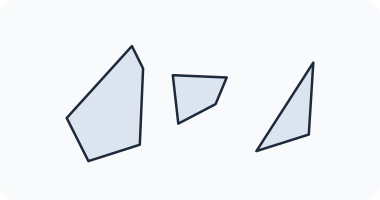
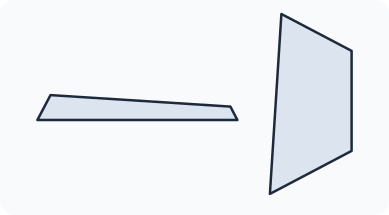
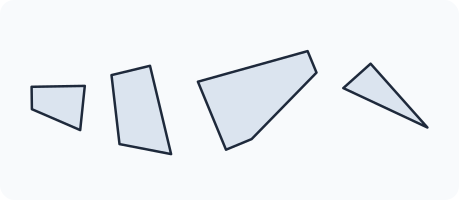
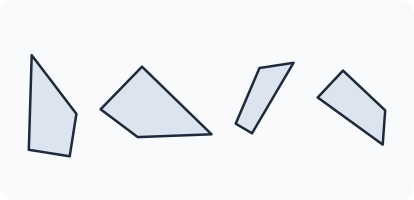
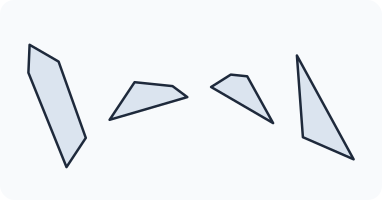
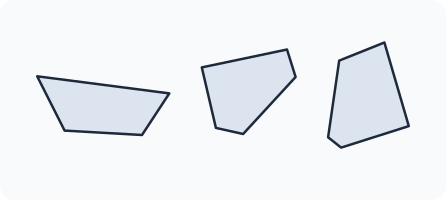
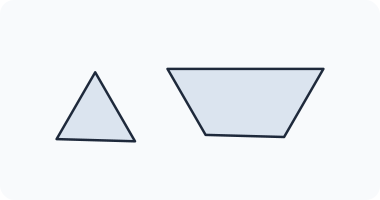
 English ▾